Mapbender is a web based geoportal framework to publish, register, view, navigate, monitor and grant secure access to spatial data infrastructure services.
Management interfaces empower administrators who need to maintain and categorize map and feature services and grant access to individuals, groups and other services.
You will need nothing but a standard web browser for this quickstart.
This Quick Start describes how to:
- start Mapbender
- create an application
- load a Web Map Service (OGC WMS)
- configure WMS
- create an individual application
- create a user and a group and assign applications to them
- load a WFS
- configure feature type and create an application with WFS search and digitize functionality
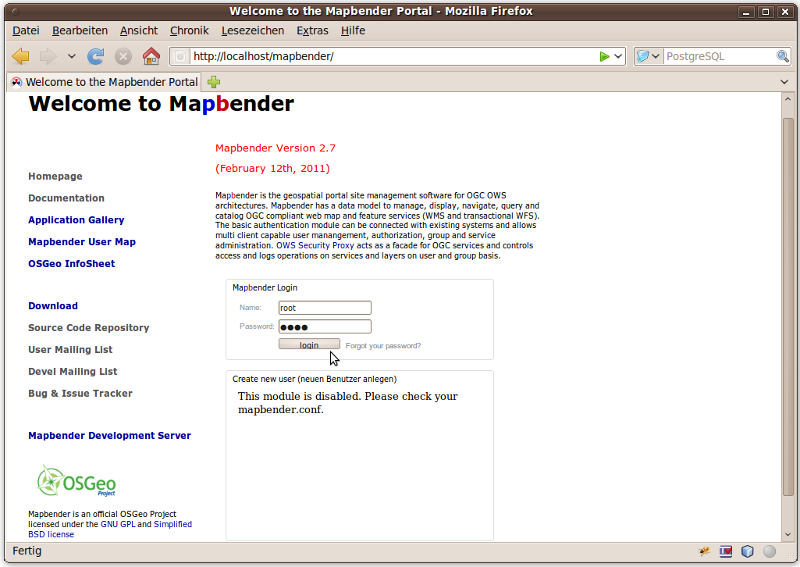
If you have any difficulties running Mapbender, please check whether your Apache web server and your PostgreSQL database are running.
After successful login you are directed to the application overview.
After the login you are directed to the application overview with a list of applications you are allowed to access. In Mapbender you have template applications, that you can use to set up your own applications.
The applications are listed in categories. Later you can define your own category and add your applications to the category you want.
Administration applications allow you f. e. to load services, create user, to set up new applications.
Each administration application provides different functionality. Later on your can set up your own administration applications with the functionality you would like to provide.
The following image shows admin2_en. At the left side you can see the menu with the possibilities which this application offers.
Tip
You get back to the application overview with the  button.
Map applications contain OGC WMS, one ore more maps, buttons, a geodata explorer, a legend element, your logo and more.
Tip
If your browser supports tabs you can open the applications in tabs and easily switch between them.
You can create a container application to store your WMS. WMS container are not for display. With containers you can create a sophisticated service repository.
You also can create a new application by copying an existing application. Go to Application Management ‣ Rename/copy application, choose the application you want to copy and define a name for the new application. This functionality not only copies the application, it also copies the services of the application and the user/groups (optional). That means that the new application already has map services and the user and groups which have access to the copied application will have access to the new application too.
You can delete an application with Application Management ‣ Delete application. Only the application is deleted, not the services which were part of the application. You are not allowed to delete applications which also belong to other users.
You can export an application as SQL with Application Management ‣ Export application (SQL). The SQL contains all the definitions of the application elements and can be imported in another Mapbender installation.
Tip
The export of an application does not contain the service information and the informations about user and group access.
You can load OGC Web Map Services (WMS) to your application.
A WMS returns an XML-file when the getCapabilities document is requested. This information is parsed by Mapbender and Mapbender gets all the necessary information about the service from this XML
Tip
You should first check the Capabilities document in your browser before you try to load it with Mapbender
Cadastre of spain
Geoportal Barcelona (Geoportalbcn - link refers to a service repository)
http://www.bcn.cat/geoportal/es/geoserveis.html
Demis World Map
http://www2.demis.nl/wms/wms.asp?wms=WorldMap&VERSION=1.1.1&REQUEST=GetCapabilities&SERVICE=WMS
Bird Studies Canada
http://www.bsc-eoc.org/cgi-bin/bsc_ows.asp?VERSION=1.1.1&REQUEST=GetCapabilities&SERVICE=WMS
Germany demo
WhereGroup OSM WMS
http://osm.wheregroup.com/cgi-bin/osm_basic.xml?REQUEST=GetCapabilities&SERVICE=WMS&VERSION=1.1.1
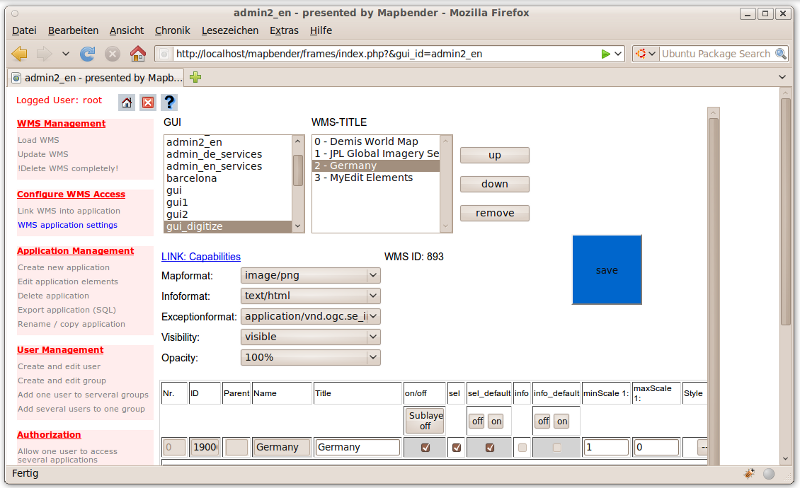
You can load more than one WMS in an application. Choose WMS application settings to change the order of the WMS or remove a WMS from your application.
The WMS with index 0 defines the default coordinate reference system and the extent of the map.
Tip
Create a container application and upload every WMS just once to this container application. You can transfer the WMS from this container to other aplications. When you update the WMS the possible changes will appear in all applications that contain this WMS. You easily can copy a WMS from one to another application with the menu entry Link WMS to application.
After upload of a WMS you can configure the WMS for your specific application. Maybe you don’t want to provide all layers or you want to change the order or titles of the layer or disable the feature info or change the maxscale for a layer.
Now you should get an idea how easy it is to change a Mapbender application without changes in the code.
When you select an element for example mapframe1 by click on the radiobutton you see that the element has a lot of attributes. These attributes are HTML attributes. By defining a Mapbender element you define an HTML element. On start of your application Mapbender will create an HTML page from all defined elements.
- id - unique name for the element
- on/off - enable/disable an element
- title - name which will be displayed as tooltip or tab
- HTML-TAG/CLOSE-TAG - type of HTML element to create for example div, img
- top, left - define the position of the element (for fixed layouts)
- width/height - define the size of the element
Some elements have element variables which allows the user to set parameters for an element. The element variables can be JavaScript variables, PHP variables, references to CSS files or CSS text definitions.
Examples for element variables:
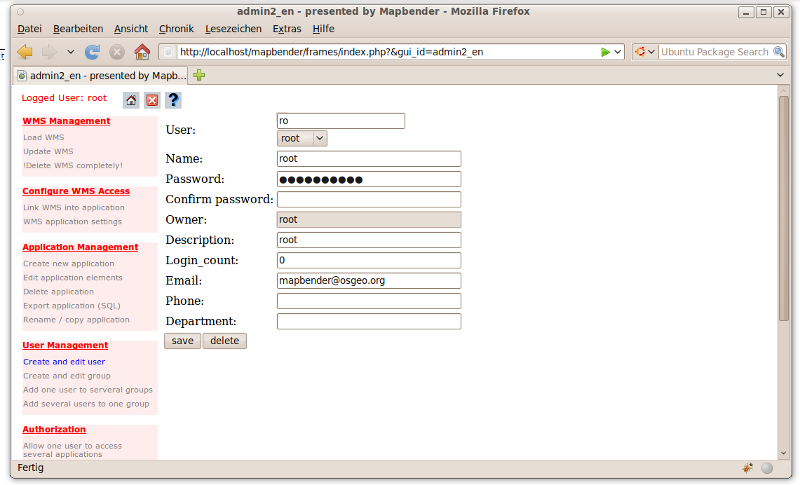
An access to Mapbender always requires authentication. This user has permissions to access one or a set of applications and the services (WMS, WFS) which are assigned to these applications.
There is no inherent difference between roles like guest, operator or administrator. The role of a user depends on the functionality and services the user has access through his applications.
Tip
If you want to grant a user write access to an application you have to use User Management ‣ Assign to edit an application to a user.
 button.
Mapbender supports OGC Web Feature Service WFS 1.0.0 and 1.1.0. A WFS can be used in Mapbender applications for different functionalities:
To use a WFS you have to load a WFS in Mapbender and generate feature type configurations.
Afterwards you have to grant access to your new feature type configuration to an application before you can use it.
If you want to set up an application with WFS digitizing you need a WFS which supports transactions (WFS-T). You can for example use the software GeoServer or deegree to set up a WFS-T.
The modules to configure WFS are integrated in the administration application admin_en_services.
Tip
You should first check the WFS getCapabilities document in your browser before you try to load it in Mapbender.
Demo WFS
http://wms.wheregroup.com/geoserver/wfs?REQUEST=getCapabilities&VERSION=1.0.0&SERVICE=WFS

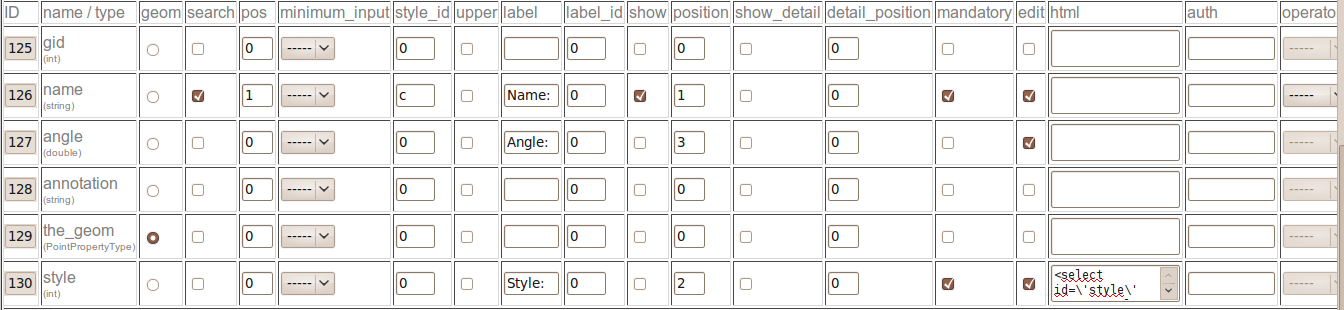
The next step is to set up a configuration for a feature type. After the configuration and authorization of an application, the configuration can be used in your applications.

Configuration
Your new configuration has to be assigned to one or more applications. This is done in WFS configuration -> Assign WFS conf to application.
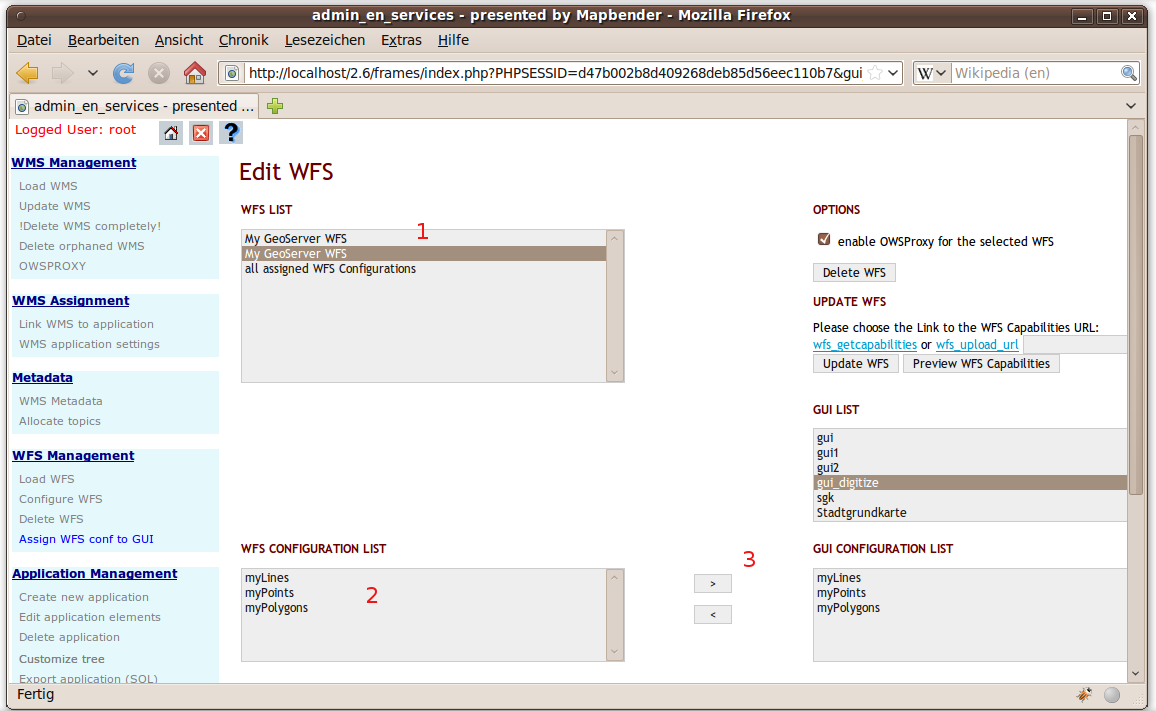
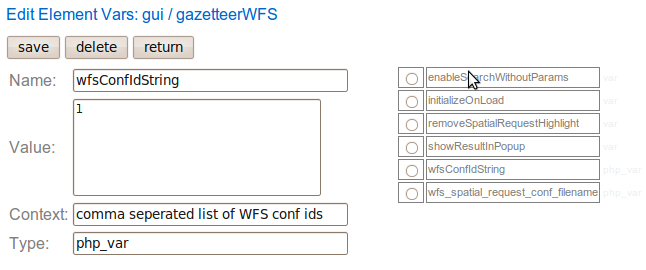
To enable your feature type configuration in an application go to admin_en_services -> Edit application elements choose your application and go to the element gazetteerWFS. The elements has an element variable wfsConfIdString. Here you can list you WFS configuraton ids (comma separated). In the order of the list the searches will be displayed in the application.
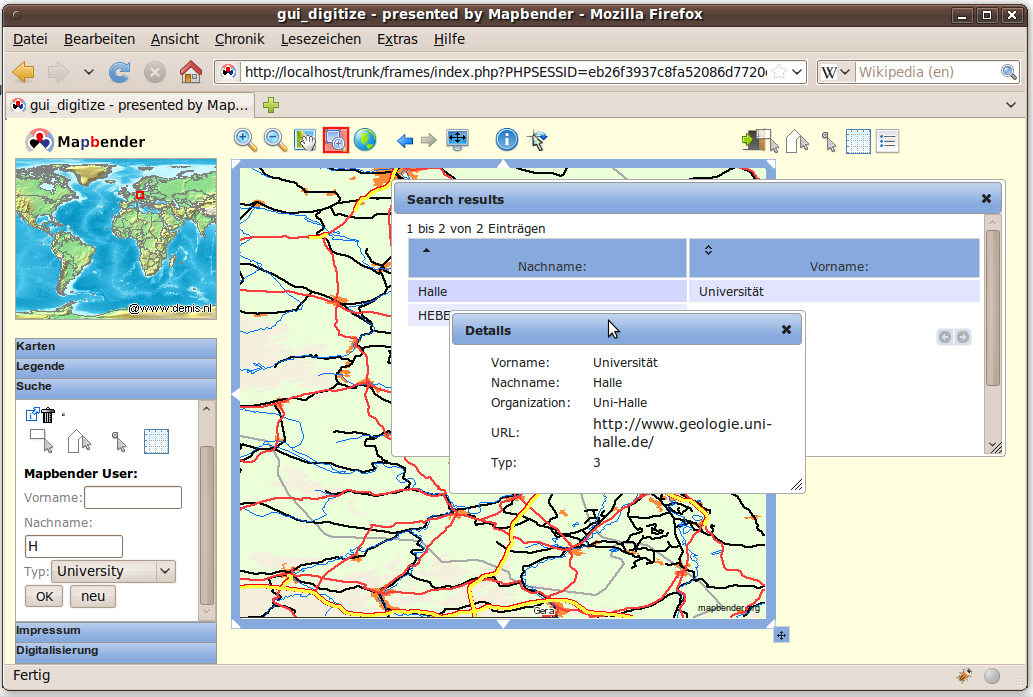
Have a look how the search could appear in an application. In this example there is a search frame at the left where you can search for Mapbender User. You can run a spatial search and define a region to search or you can do an alphanumeric search. The search results are displayed in a result table. On click on a result entry Mapbender zooms to the location and detail information is displayed.
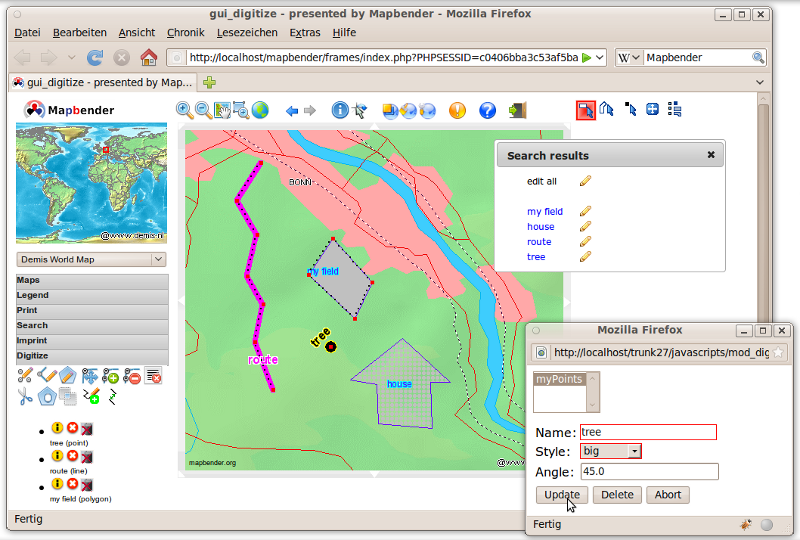
The easiest way to get an application that supports WFS digitizing is to copy gui_digitize. Now you only have to connect a WMS layer with your feature type configuration. This is done in WMS application settings with the button set WFS in the layer-list. Hit the button and select your configuration id.
Now you can search with the spatial search at the right for existing objects which are displayed in a seach result frame. The objects can be updated (move object, add basepoint, edit attributes, split line, continue line, merge polygons...). You also can create new objects.
Here are some additional challenges for you to try:
This is only the first step on the road to using Mapbender. There is a lot more functionality you can try.
Mapbender Project home
http://www.mapbender.org/
You find tutorials at
http://www.mapbender.org/Tutorials
Try the tutorial in english language
http://www.mapbender.org/Mapbender_Tutorial_en
Get to know Mapbender on
http://projects.mapbender.osgeo.org
Get involved in the project
http://www.mapbender.org/Community