
52°North WSS Quickstart
The 52°North WSS is a web service that allows policy-based access to OGC Web Services acting as a proxy.
This Quick Start describes how to:
- start the WSS management interface
- protect a local WMS instance
- register new users
- asign permissions to existent users
- load protected services
Contents
Getting Started
For this OSGeo-Live distribution, the 52°North WSS is already set up to protect an instance of each supported OGC service: WMS, WFS, WPS, and SOS.
To get a list of protected services follow these steps:
Go to to start the 52°North WSS or use this direct link.
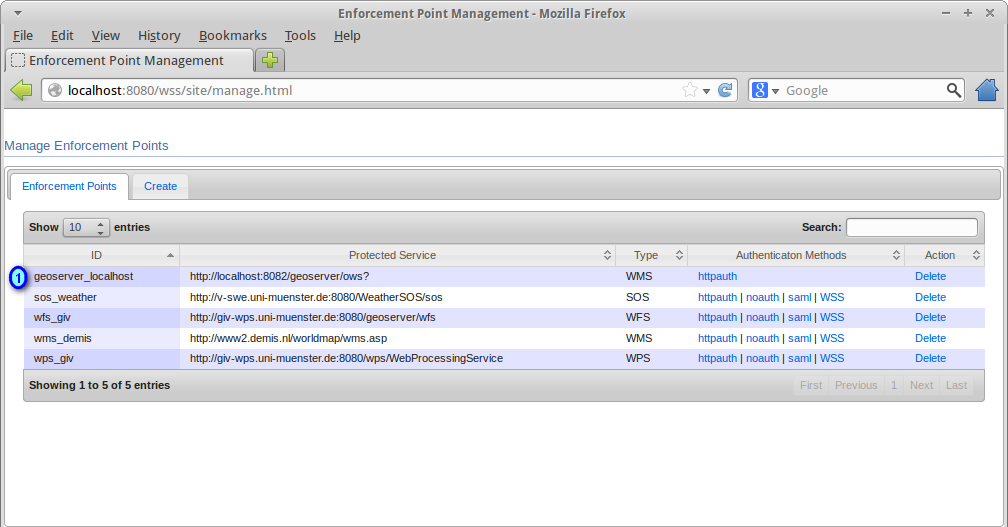
The 52°North WSS management interface will open in a browser window. Click Manage WSS (1) to get a list of those services, that can be connected using the WSS.
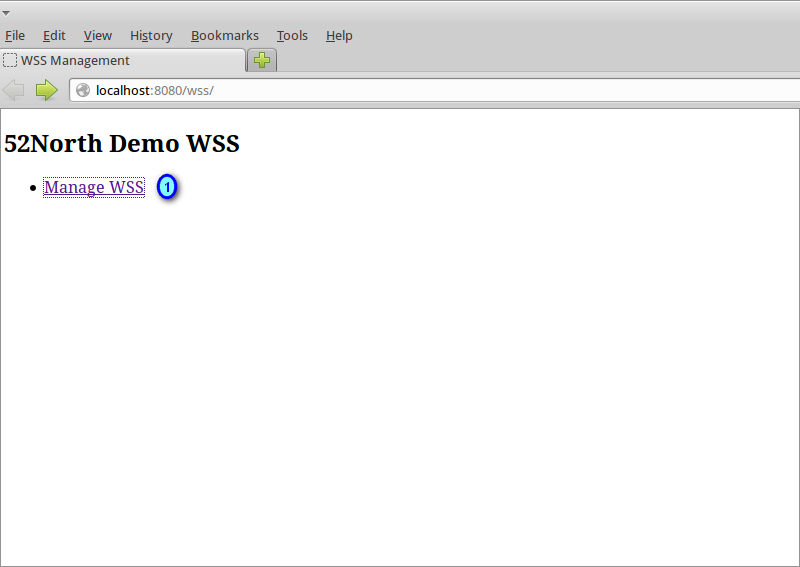
Tip
If it’s requested, authenticate as user/user
WSS manager
For each protected service, called Enforcement Point, the table contains the base links to the service by authentication method (httpauth, saml, WSS, ...). The table has the following columns:
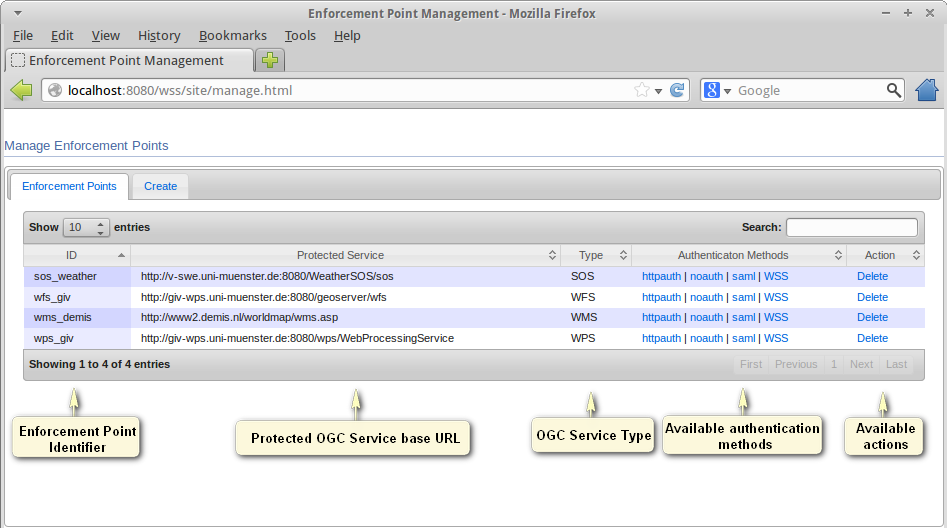
- Enforcement Point Identifier
- Protected OGC Service base URL
- OGC Service Type
- Available authentication methods
- Available actions
Secure a WMS
In this section we’re going to protect a local WMS instance.
Create a new enforcement point
Start the GeoServer WMS included in the OSGeo-Live DVD by selecting . GeoServer takes up to a minute to start, and will open a browser window once finished.
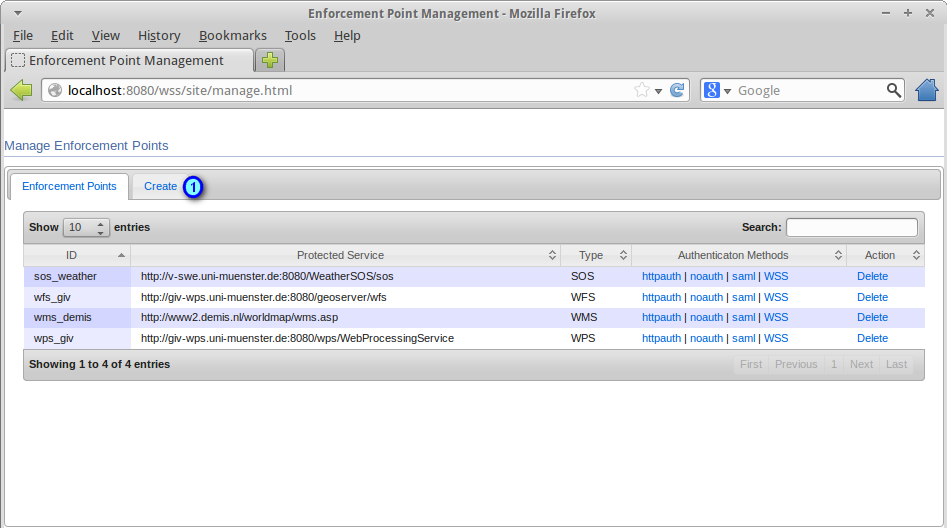
Press the Create link (1) in the manager main window
Fill the new protected server properties
- ID : geoserver_localhost (1),
- Protected Service URL : http://localhost:8082/geoserver/ows? (2)
- Type : WMS (3)
- Autenthication Scheme : HTTP Basic (4)
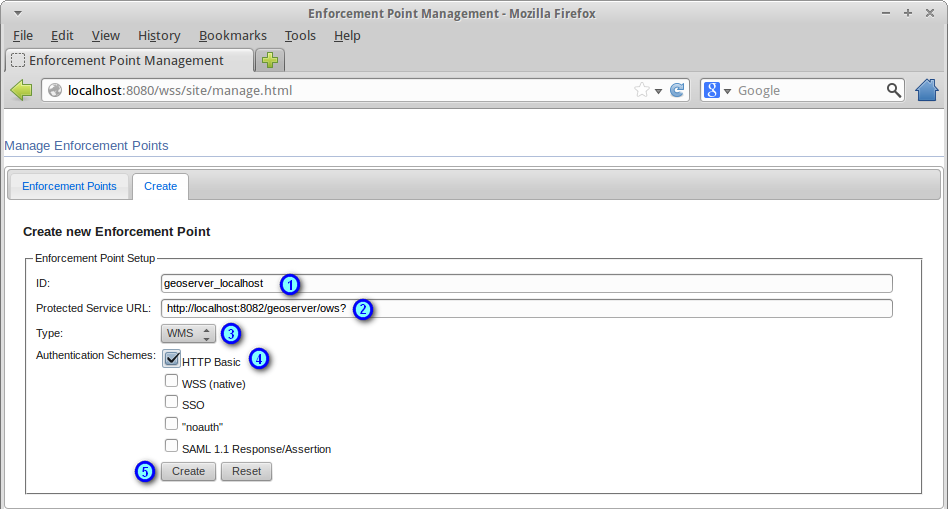
Press the Create button to create the new Enforcement Point. A new row will appear in the manager main window
Create a new user
Open a new terminal emulator by selecting the menu option
Edit the file
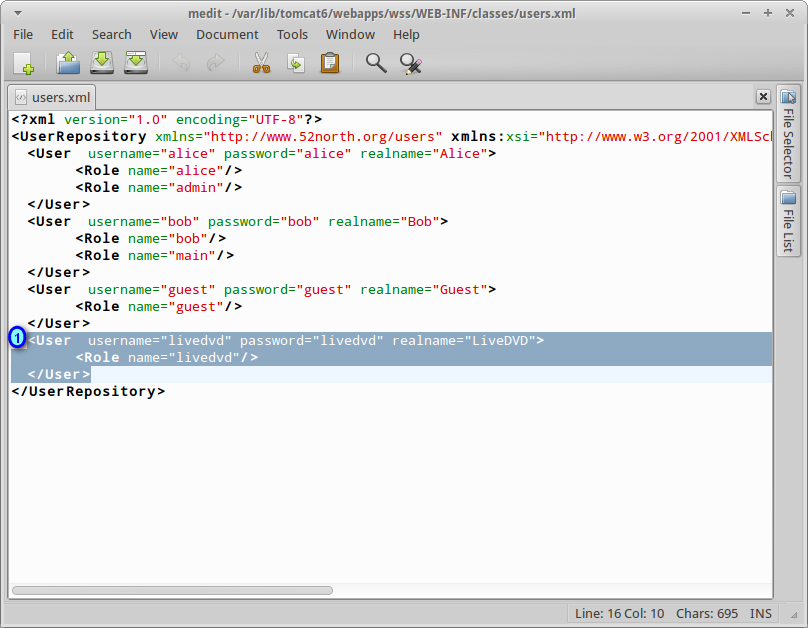
users.xmlpresent at the directory/var/lib/tomcat6/webapps/wss/WEB-INF/classes/:$ cd /var/lib/tomcat6/webapps/wss/WEB-INF/classes/ $ sudo medit users.xml
Add a new user called livedvd by adding the next text as a new entry at <UserRepository> level (1):
<User  username="livedvd" password="livedvd" realname="LiveDVD">
  <Role name="livedvd"/>
</User>
Save the changes and exit medit
Note
The users.xml file is only available to users with access to root privileges, which is achieved when using the “sudo” command. You will need to use the password “user” if prompted.
Adjust new user policies
Now we will set up the following access policies for the newly protected WMS:
- User livedvd -> Full access to all the layers from the WMS
- Users bob and guest -> Access only to the layer tasmania
- Other users -> Access not authorized to the WMS
Return to the terminal emulator window.
Edit the file
permissions.xmlpresent at the directory/var/lib/tomcat6/webapps/wss/WEB-INF/classes/:$ sudo medit permissions.xml
Add a new permission set called Geoserver localhost by adding the following text as a new entry at <SimplePermissions> level (1):
<PermissionSet name="Geoserver localhost">
  <ResourceDomain value="http://localhost:8080/wss/service/geoserver_localhost/*"/>
  <ActionDomain value="http://localhost:8080/wss/service/geoserver_localhost/*"/>
  <SubjectDomain value="urn:n52:security:subject:role"/>
  <Permission name="livedvd_all_geoserver">
    <Resource value="layers/*"/>
    <!-- Any layers -->
    <Action value="operations/*"/>
    <!-- Any operations -->
    <Subject value="livedvd"/>
  </Permission>
  <Permission name="bobAndGuest_most_GetMap_GetCaps_geoserver">
    <Resource value="layers/tasmania"/>
    <Action value="operations/GetCapabilities"/>
    <Action value="operations/GetMap"/>
    <Subject value="bob"/>
    <Subject value="guest"/>
  </Permission>
</PermissionSet>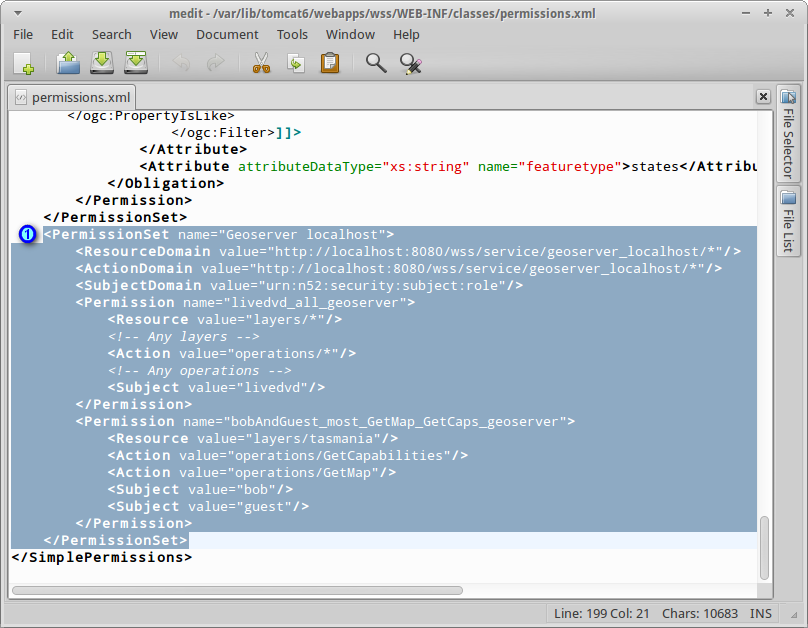
Save the changes and exit medit
Restart Tomcat
In order to load the users and permissions changes, it’s necessary to restart the Tomcat service:
Return to the terminal emulator window.
Restart the tomcat service:
$ sudo service tomcat6 restart
Load a protected OGC Service
In order to request the capabilities of the protected Geoserver WMS, follow the next steps:
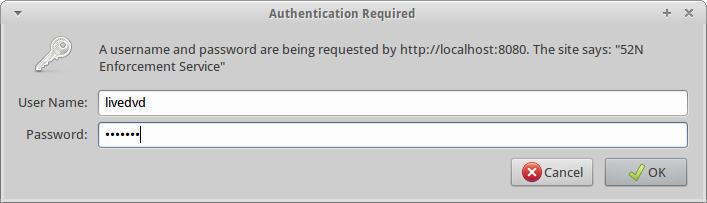
Type http://localhost:8080/wss/service/geoserver_localhost/httpauth?SERVICE=WMS&REQUEST=GetCapabilities in a browser
Authenticate as livedvd/livedvd to get access with full permissions or authenticate as bob/bob to access the service under limited permissions (only tasmania layer will be available)
Note
If you’d like to request the capabilities with a different user account you have to restart the browser in order to invalidate current user cached credentials
To further test the protected service, load http://localhost:8080/wss/service/geoserver_localhost/httpauth as WMS into any desktop mapping client that supports HTTP Basic Authentication. Follow the next steps for QGis:
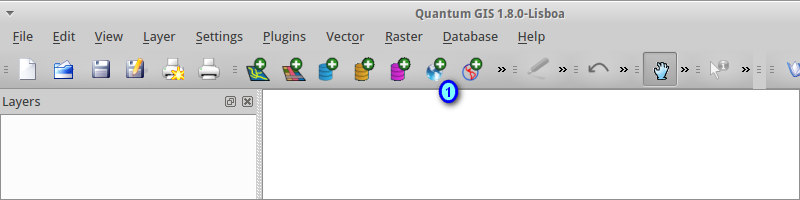
From the start menu, select
The application will take a few seconds to start (a splash screen is shown while loading)
Press the Add WMS Layer button from the main toolbar (1)
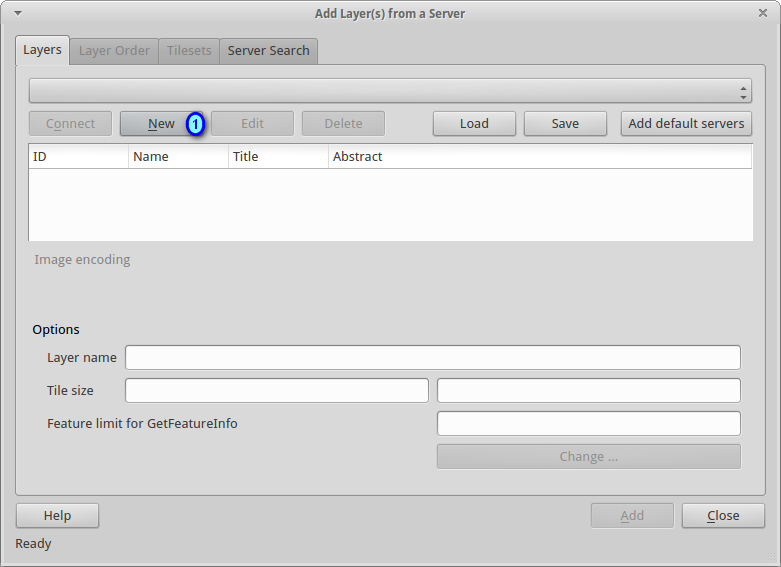
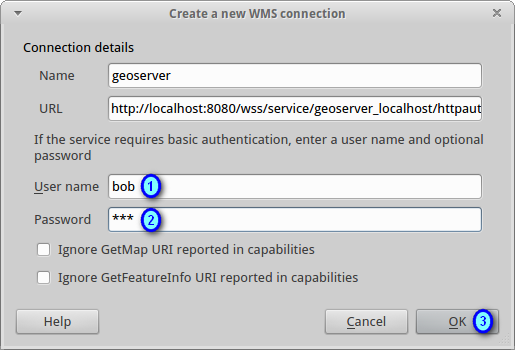
Press the New button (1) in order to create a new WMS connection
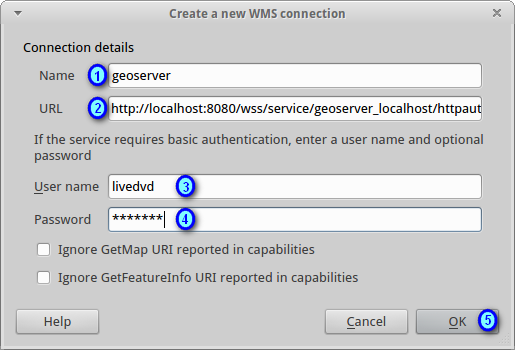
Set the connection properties and press Ok button (5) to create the connection
- Name : geoserver (1),
- URL : http://localhost:8080/wss/service/geoserver_localhost/httpauth (2)
- User name : livedvd (3)
- Password : livedvd (4)
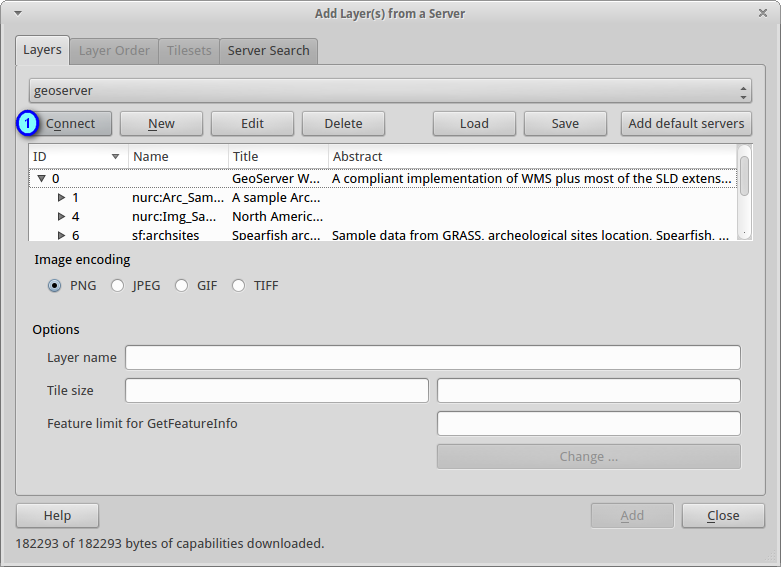
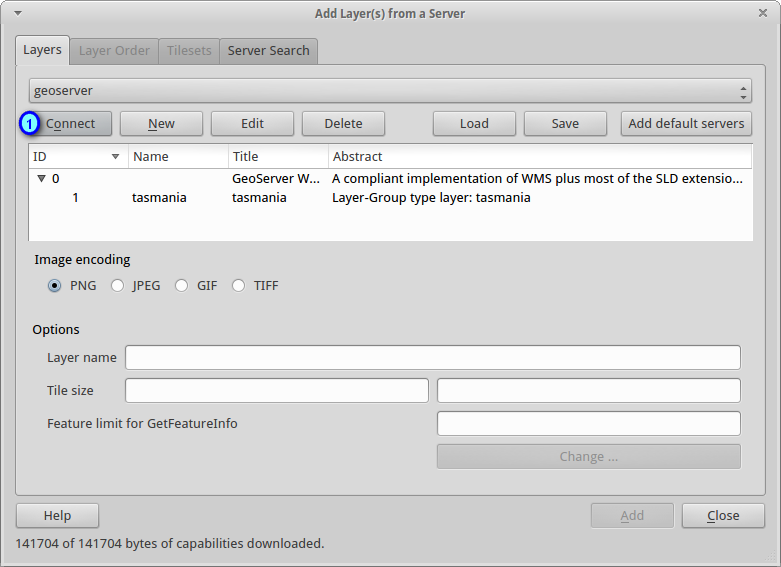
Press the Connect button (1) to load the WMS layers. The full list of layers will be available for the user livedvd
Press the Edit button (1) to edit the connection properties
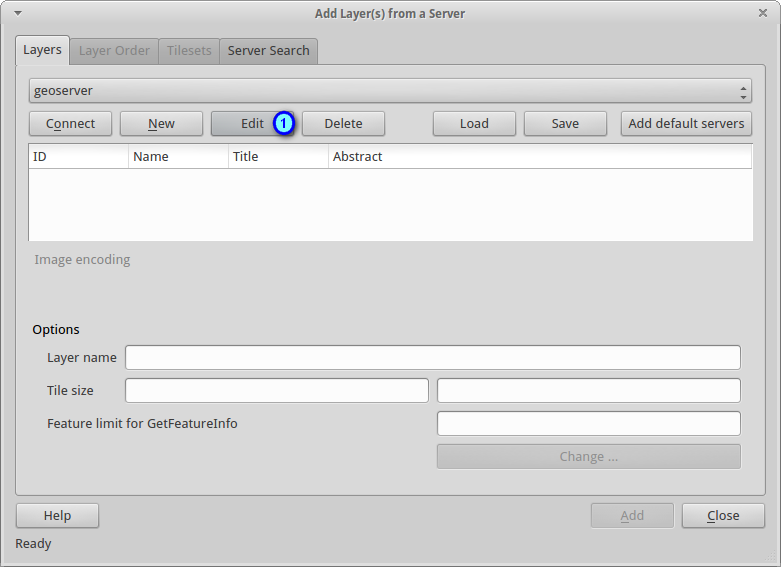
Set the connection properties again and press Ok button (3) to edit the connection
- User name : bob (1)
- Password : bob (2)
Press the Connect button (1) to reload the WMS layers. Only tasmania layer will be available for the user bob
Things to try
Here are some additional challenges for you to try:
- Protect a WFS from the local Geoserver instance
- Add more users to a protected OGC service
- Modify the access policies to any of the other protected services for the user livedvd
What Next?
Visit the 52°North User Guide