MapTiler Quickstart
MapTiler provides a simple way of creating a set of tiles from any georeferenced map image. The tiles can then be presented as a as a georeferenced map overlay on a web server. It follows the Open Source Geospatial Foundation’s (OSGeo’s) Tile Map Service (TMS) specification.
- Input options: Any georeferenced image file, eg. a TIFF, JPEG from ArcGIS, QGIS.
- Output options: A set of directories with tiled images which can be copied to a web server for presentation as a georeferenced overlay. View examples.
- Strengths: MapTiler is simple, free, open-source software, with an easy wizard, described below, to guide through the options.
MapTiler takes advantage of the fact that Google Maps , Microsoft Bing , Yahoo Maps , and other online mapping providers including OpenStreetMap use the same projection and tiling profile and the tiles are therefore compatible. The Tiles à la Google Maps page describes and illustrates this. MapTiler prepares tiles using this specification as an easy and quick way of preparing a georeferenced map in a mashup web page.
Start MapTiler
- Download MapTiler to your it on your computer or start it directly from this LiveDVD.
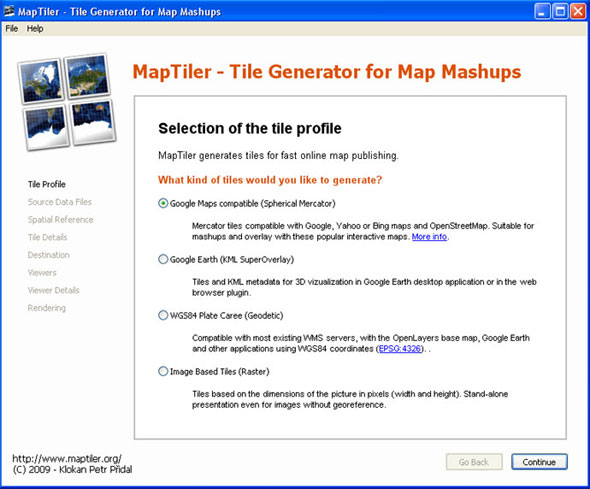
- Select the Tile Profile. Choose Google Maps Compatible (Spherical Mercator) for standard web publishing. Choose Google Earth (KML SuperOverlay) if you also want to generate a KML file for use in Google Earth. Click Continue.
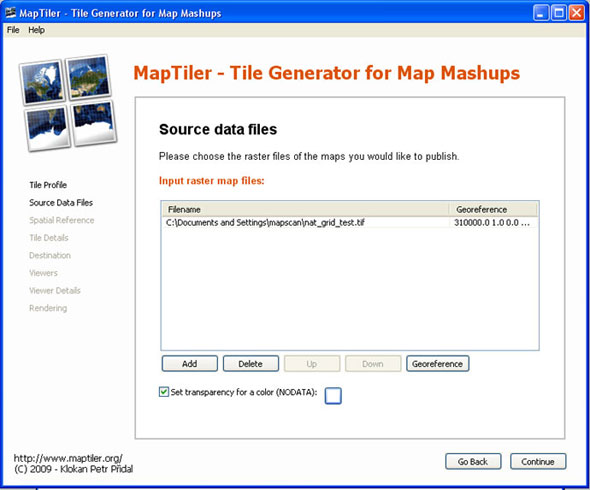
- Choose the Source Data Files. Browse to select the raster image you want to tile. It is also possible to select a NODATA colour that will appear as transparent in the resulting image. Click Continue.
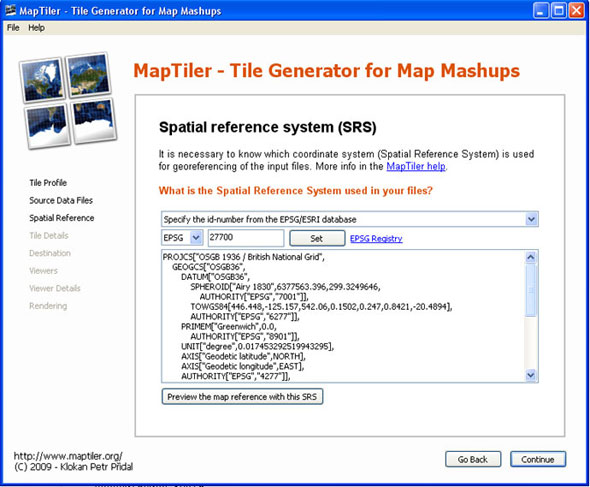
- Specify the Spatial Reference System / Coordinate System of the image. Specify the id-number from the EPSG/ESRI database. If you have maps from UK for example the transformation should include the EPSG:27700 with TOWGS84 parameter. Click Continue.
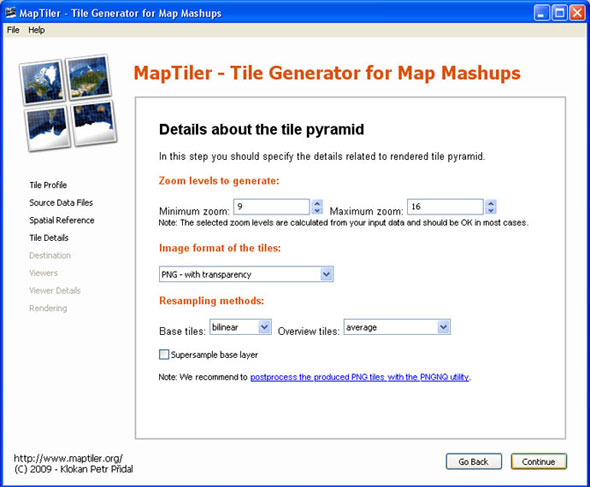
- Specify details about the Tile Pyramid. The default settings for zoom levels and file format are often best. Click Continue.
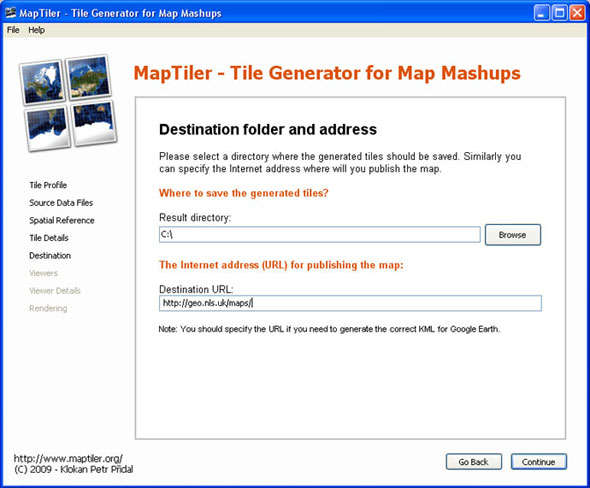
- Specify details about the Destination folder and Addresses / URLs for the tileset. If you do not know these, they can be added into the default googlemaps.html and openlayers.html files after tile generation. Click Continue.
- Tick the Viewers that should be generated. By default, a googlemaps.html and openlayers.html file are generated. You can also choose to generate a KML SuperOverlay file for Google Earth. Click Continue.

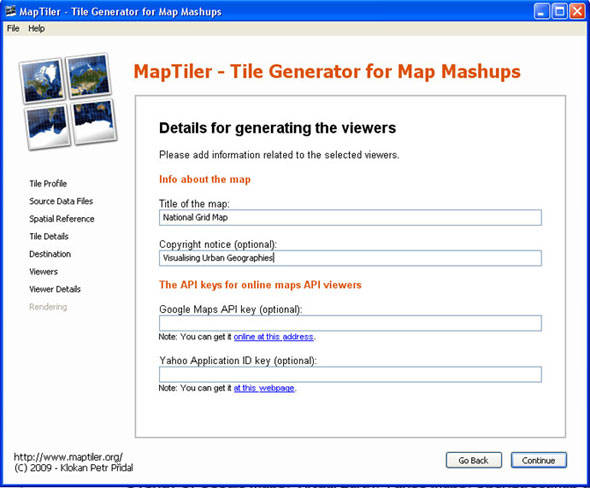
- Specify the Details for generating the Viewers, such as the title, copyright notice, and API keys. If you do not know these, they can be added into the default googlemaps.html / openlayers.html files after tile generation. Click Continue.
- Click Render to start rendering the image. When complete, MapTiler provides a link to the finished tileset. Open the googlemaps.html or openlayers.html files in a web browser to view the tileset as an overlay on the live online map. To present this on the web, just copy the entire tileset and all subdirectories to a web server, and edit the googlemaps.html or openlayers.html files as required.
