
OSGeo-Live can be installed and run as a “guest” virtual machine on a host computer. The host can be either Windows or Linux. The host machine will have software (such as VMWare Player) installed to run the virtual machine. Following are instructions for setting up OSGeo-Live as a Virtual Machine.
Running OSGeo-Live in a VM enhances the LiveDVD experience by allowing the user to save his work, update the Live system and add additional software. In addition, the virtual computer is much more responsive than when running off the original DVD. The OSGeo virtual machine creates a full, natural computer environment. Unlike the LiveDVD, data and files are saved, configurations are persistant, as if you had a second computer inside your main “host” machine. This platform extends OSGeo-Live usability beyond the basics of presentation and training, and into the realm of real world GIS work.
Your host computer should have at least 2GB of RAM memory. You will allocate 1GB to the virtual machine, and leave 1GB for the host. More memory is always better, so depending on performance, you can readjust the amount of memory for the guest VM later. Regarding disk space, you’ll need at least 25GB free. Creating an even larger virtual hard disk will leave you with more room for your work. In addition the CPU in your computer should support virtual machines. (Most computers produced in the last five years have a CPU that includes VT=Virtualization Technology).
Download the VM version of OSGeo-Live. You will need the 7-zip compression program to unzip this file. And of course the VMWare Player software for running the virtual machine. Note that VMWare Player, while offered as a cost-free download, is not open source. You must register on the VMWare website, and agree to their licence in order to use the software.:
Unzip the osgeo-live-vm using the command
7z e osgeo-live-vm-5.5.7z
or using the 7-zip GUI program. Also install the VMWare Player software.
In order to run the OSGeo virtual machine, we first need to create a virtual machine configuration file vmx. The quick way is to browse to:
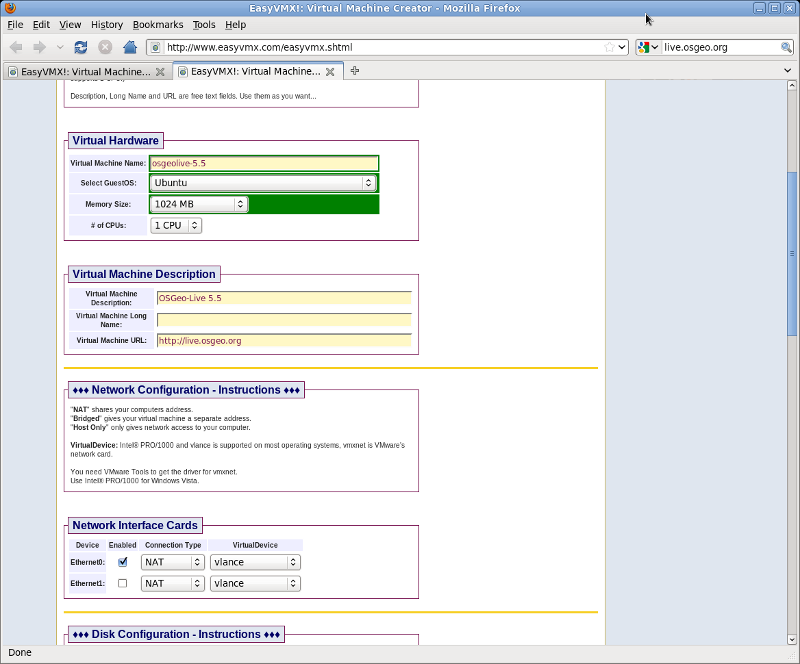
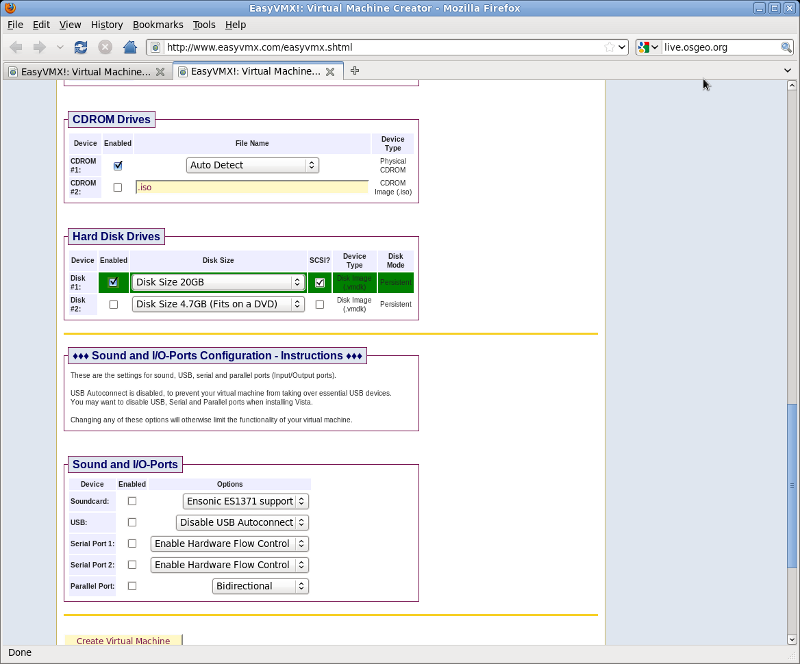
Click the button at bottom “Create Experimental Virtual Machine”. The website creates a properly formated vmx file containing all the above configurations. You need to place this file into the directory on your computer where the OSGeo vmdk file is located. So in the next screen, copy all lines from #!/usr/bin/vmplayer to # END OF EasyVMX! CONFIG and paste into a new file named osgeolive-5.5.vmx.
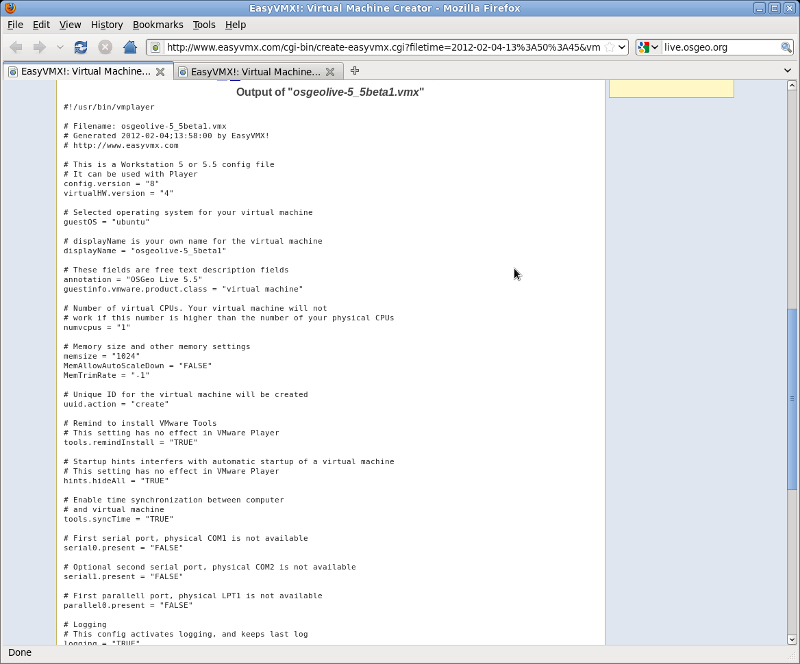
The file basename (without the vmx extension) should match the file basename of the OSGeo vmdk file. Also double check the line in the vmx file that refers to scsi0:0.fileName =. Make sure that this also exactly matches the downloaded vmdk file name. Save this new vmx file into the same directory as your downloaded OSGeo vmdk.
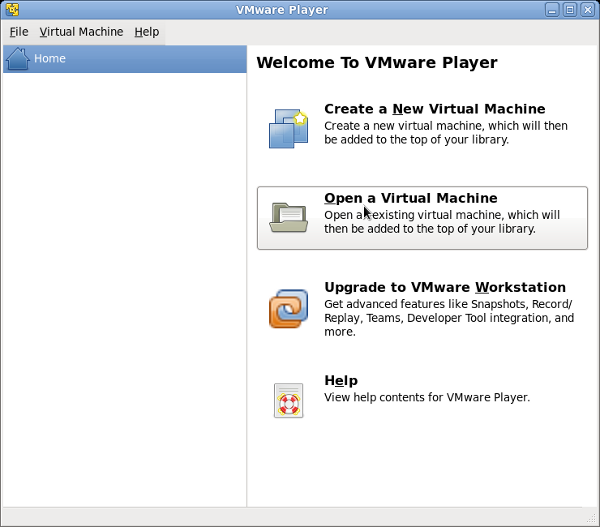
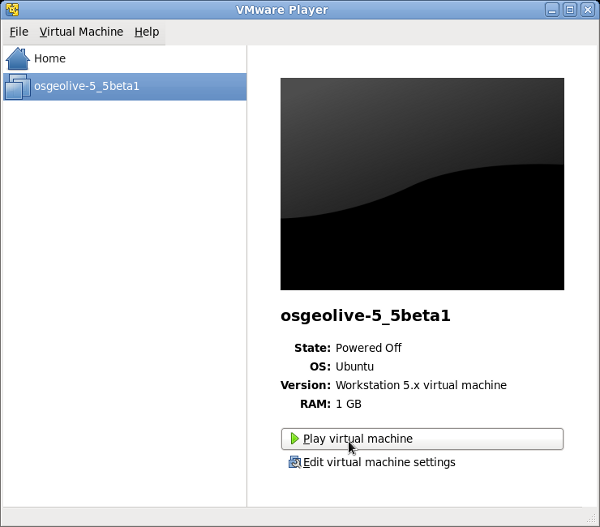
Now fire up VMWare Player and click the Open a Virtual Machine button. Browse to the directory where both the downloaded vmdk and the newly created vmx are located. Point to the vmx and the new virtual machine should be added to the list in the Player window. Click the Play Virtual Machine button and the OSGeo VM should boot up.
The first thing you’ll want to do is install the VMWare-tools packages. Once these are installed, you can improve the display resolution, and share folders between your host computer and the OSGeo-Live VM. Run this command in a command terminal to install the VMWare tools:
sudo apt-get install open-vm-dkms open-vm-toolbox
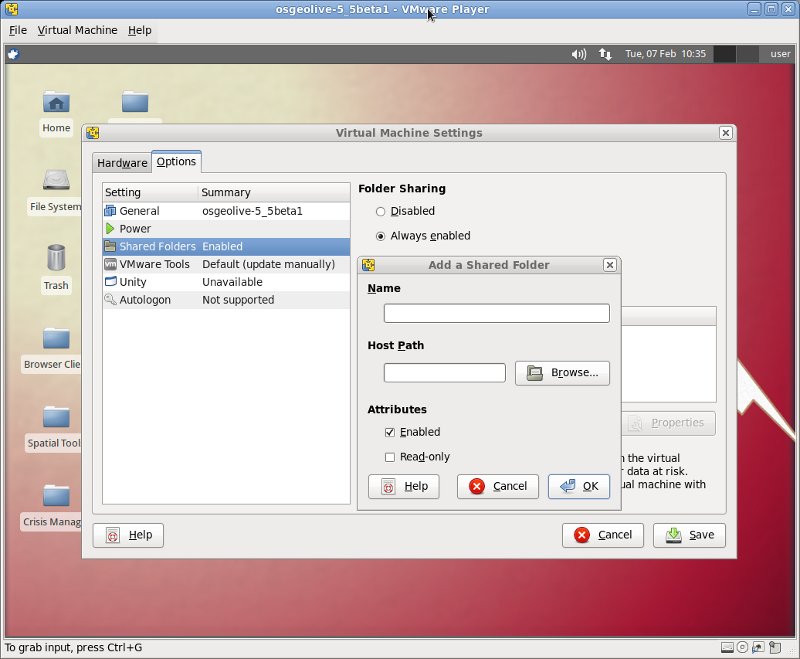
In the Virtual Machine window, select Virtual Machine ‣ Virtual Machine Settings menu, shift over to the Options tab, and click the Shared Folders setting. Now you can click the “+” button to add a directory from your host computer to be shared inside the virtual OSGeo-Live system. Suppose you want to share the directory C:\Users\your_name\Downloads. Click the browse button to find the directory, give it a name such as “Downloads”, and click “Save”.
Now run two additional commands in the terminal to mount the shared folder:
sudo mkdir /mnt/Downloads
sudo mount -t vmhgfs .host:/Downloads /mnt/Downloads
And enjoy...