This Quick Start describes some basic steps required to start working with OpenLayers3: creating a basic map, adding raster and vector layers and styling features.
OpenLayers3 is a light-weight mapping library for web and mobile clients which uses modern browser technologies, such as HTML5, WebGL and CSS3.
Contents
Before we start working with OpenLayers it helps to understand OpenLayers core concepts:
In this step we will create a basic map.
Create a file in say /home/user/ called basic-map.html , and copy the following into the file.
<!DOCTYPE html>
<html lang="en">
    <head>
        <title>Basic map</title>
        <meta charset="UTF-8">
        <meta name="viewport" content="width=device-width">

        <!-- OpenLayers CSS -->
        <link rel="stylesheet" href="http://localhost/ol3/dist/ol.css" type="text/css">

        <!-- Custom styles -->
        <style>
          #map {
            width: 100%;
            height: 500px;
          }
        </style>
    </head>
    <body>
        <h1>Basic map</h1>

        <div id="map"></div>

        <!-- OpenLayers JS-->
        <script src="http://localhost/ol3/dist/ol-debug.js" type="text/javascript"></script>

        <!-- App code -->
        <script>
          var map = new ol.Map({
            target: 'map',
            renderer: 'canvas',
            layers: [
              new ol.layer.Tile({
                source: new ol.source.OSM()
              })
            ],
            view: new ol.View({
              center: ol.proj.transform([2.1833, 41.3833], 'EPSG:4326', 'EPSG:3857'),
              zoom: 6
            })
          });
        </script>

    </body>
</html>
Ex. 1: Basic code structure
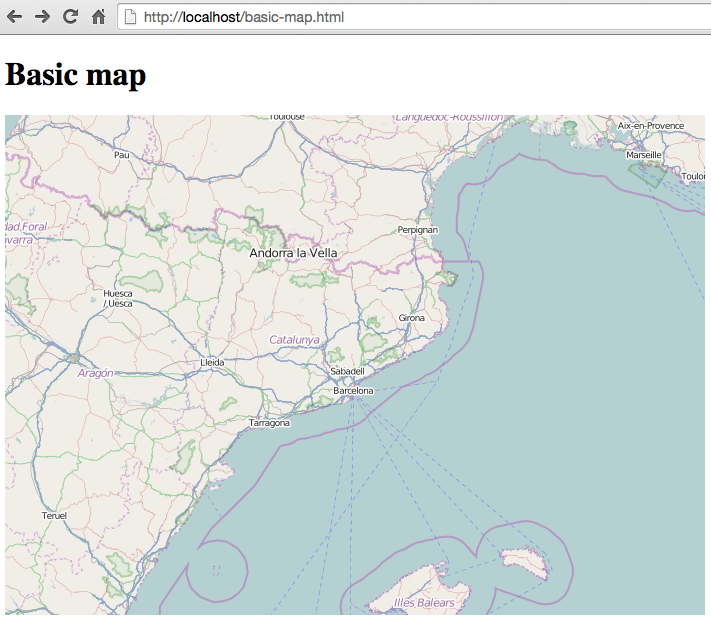
Now try opening basic-map.html from a web browser. You should see the following:

Note:
The most used raster layers are the tiled layers, provided by the likes of OpenStreetMap, MapQuest, Bing, etc. Tiled layers are represented by the ol.layer.Tile class and must use a source that knows how to load tiles from a given provider, like ol.source.OSM or ol.source.MapQuest:
var osm = new ol.layer.Tile({
  source: new ol.source.OSM()
});

var mq = new ol.layer.Tile({
  source: new ol.source.MapQuest({
    layer: 'osm'
  })
});
Ex. 2: Create raster layers
Layers can be added to the map in two ways:
var map = new ol.Map({
  ...
  layers: [osm, mq]
  ...
});
Ex. 3: Adding layers on map initialization
map.addLayer(osm);
map.addLayer(mq);
Ex. 4: Adding layers manually
Vector layers are represented by the ol.layer.Vector and must use a source suitable for reading the vector format, like ol.source.GeoJSON, ol.source.KML or ol.source.TopoJSON.
var vectorLayer = new ol.layer.Vector({
  source: new ol.source.GeoJSON({
    url: 'url_to_geojson_file'
  })
});

// Add Vector layer to map
map.addLayer(vectorLayer);
Ex. 5: Constructing a GeoJSON vector layer

Note, in the previous code we must change the url_to_file to point to a valid GeoJSON file placed in our server. Note that Javascript security will prevents sourcing of datasets from an external URL on a different domain.
Features can also be created manually. In this case we need to create a geometry that represents the feature:
// Geometries
var point = new ol.geom.Point(
    ol.proj.transform([3,50], 'EPSG:4326', 'EPSG:3857')
);
var circle = new ol.geom.Circle(
    ol.proj.transform([2.1833, 41.3833], 'EPSG:4326', 'EPSG:3857'),
    1000000
);

// Features
var pointFeature = new ol.Feature(point);
var circleFeature = new ol.Feature(circle);

// Source
var vectorSource = new ol.source.Vector({
    projection: 'EPSG:4326'
});
vectorSource.addFeatures([pointFeature, circleFeature]);

// Vector layer
var vectorLayer = new ol.layer.Vector({
  source: vectorSource
});

// Add Vector layer to map
map.addLayer(vectorLayer);
Ex. 6: Adding features by hand
Features within vector layers can be styled. The style is determined by a combination of fill, stroke, text and image, which are all optional. In addition, a style can be applied to a layer, which determines the style of all contained features, or to an individual feature.
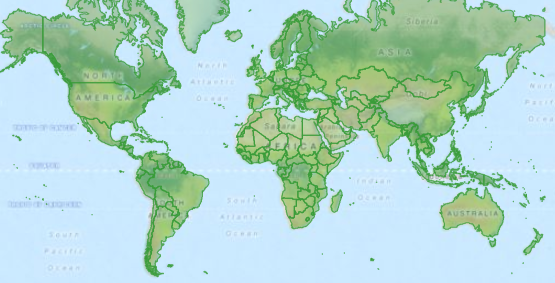
An style is represented by the ol.style.Style class which has properties to set the fill, stroke, text and image to be applied. The next example shows the World’s administrative limits styled to use a green fill and stroke:

var limitsLayer = new ol.layer.Vector({
  source: new ol.source.StaticVector({
    url: 'data/world_limits.json',
    format: new ol.format.TopoJSON(),
    projection: 'EPSG:3857'
  }),
  style: new ol.style.Style({
    fill: new ol.style.Fill({
      color: 'rgba(55, 155, 55, 0.3)'
    }),
    stroke: new ol.style.Stroke({
      color: 'rgba(55, 155, 55, 0.8)',
      width: 1
    }),
    image: new ol.style.Circle({
      radius: 7,
      fill: new ol.style.Fill({
        color: 'rgba(55, 155, 55, 0.5)',
      })
    })
  })
});
Ex. 7: Styling features
In the code, we have loaded a TopoJSON file and styled it through the style property. We have set a fill and stroke, required for lines and polygons, and an image (in this case a circle) used for point features.
Most of the components, like map, layers or controls, trigger events to notify changes. For example we can be notified each time the mouse is moved over the map, when a feature is added to a vector layer, etc.
Events can be easily registered on object with the on() method and unregistered with un().
The next code registers an event on a map instance, and is notified each time the pointer is moved. Within the callback function we obtain the pointer coordinates and print in the browser console in two different projections.
map.on('pointermove', function(event) {
  var coord3857 = event.coordinate;
  var coord4326 = ol.proj.transform(coord3857, 'EPSG:3857', 'EPSG:4326');

  console.log(coord3857, coord4326);
});
Ex. 8: Printing pointer position.
Sometimes the quickest way to work out how OpenLayers works is to look at examples and its source code. You can find more OpenLayers3 information here: