project logo

Cartaro Quickstart

Cartaro is a geo-enabled Content Management System (CMS) to manage and publish geospatial and non-geospatial content.

This Quick Start will guide you through the following tasks:

  • Create a new geo-enabled content type
  • Configure Cartaro to display the new content type
  • Add new content

Start Cartaro

  1. Choose Geospatial ‣ Browser Clients ‣ Start Cartaro.
  2. The application will take a few moments to start up
  3. Go to the Cartaro web page at http://localhost/cartaro (this should happen automatically)

Front Page

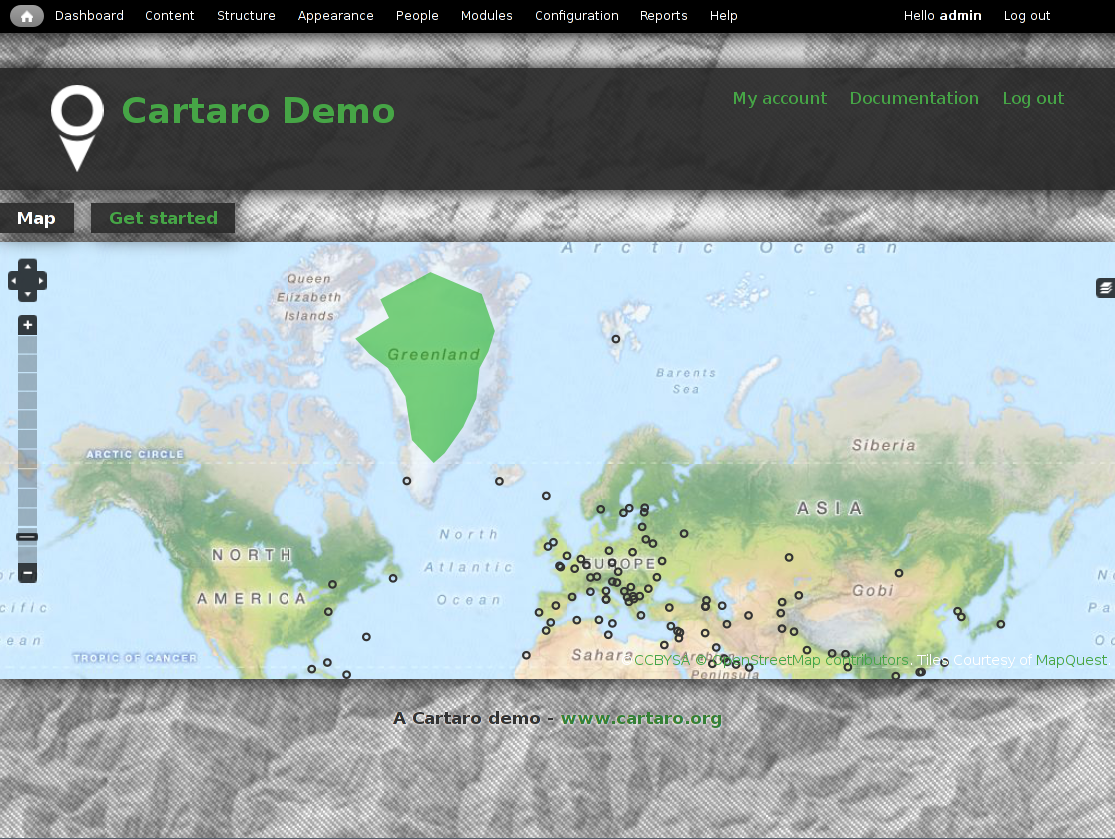
When you open the Cartaro page, you will see the screen above. The front page contains an example map with capital cities.
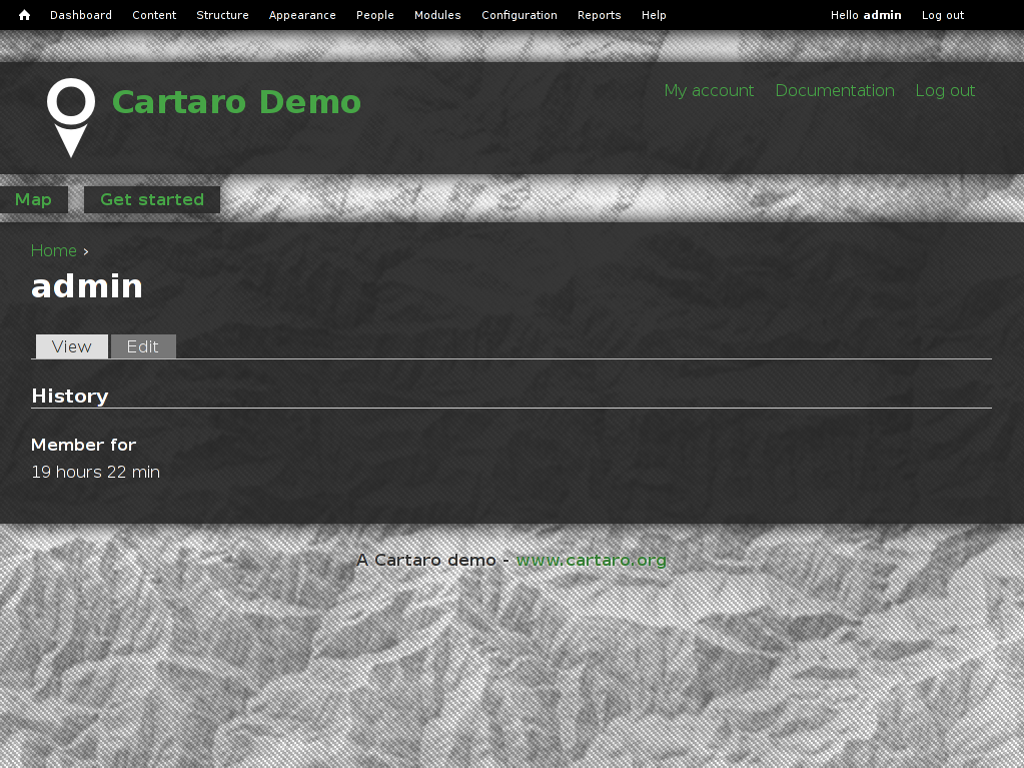
../../_images/cartaro_frontpage.png
  • Click on Log in on the upper right corner to access the administrative interface. Please use admin as username and geoserver as password. You will now see the admin tool bar on top.
../../_images/cartaro_userpage.png

Tip

You can return to the Front Page anytime by clicking on the home icon in the upper left corner.

Create new content type

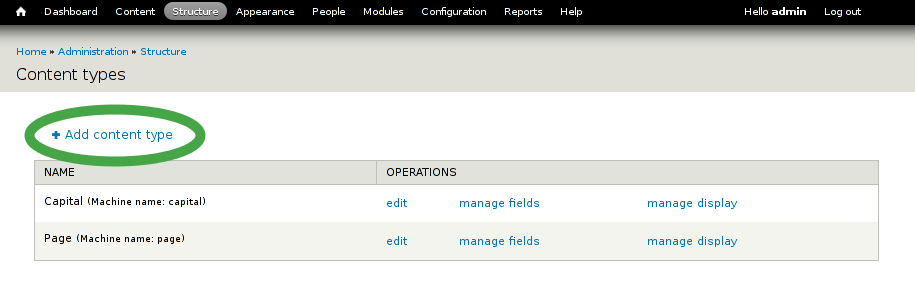
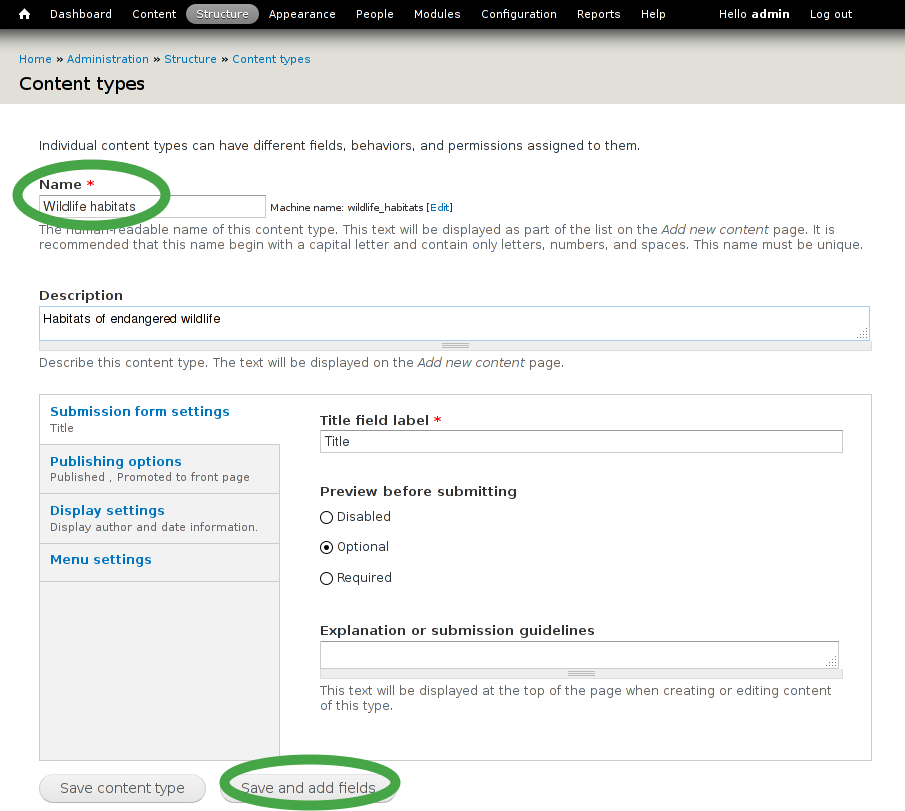
Content types are describing the fields and the structure of a specific kind of content (e.g. the content type Capital contains the fields name and location). To create a new content type, just follow the steps below.
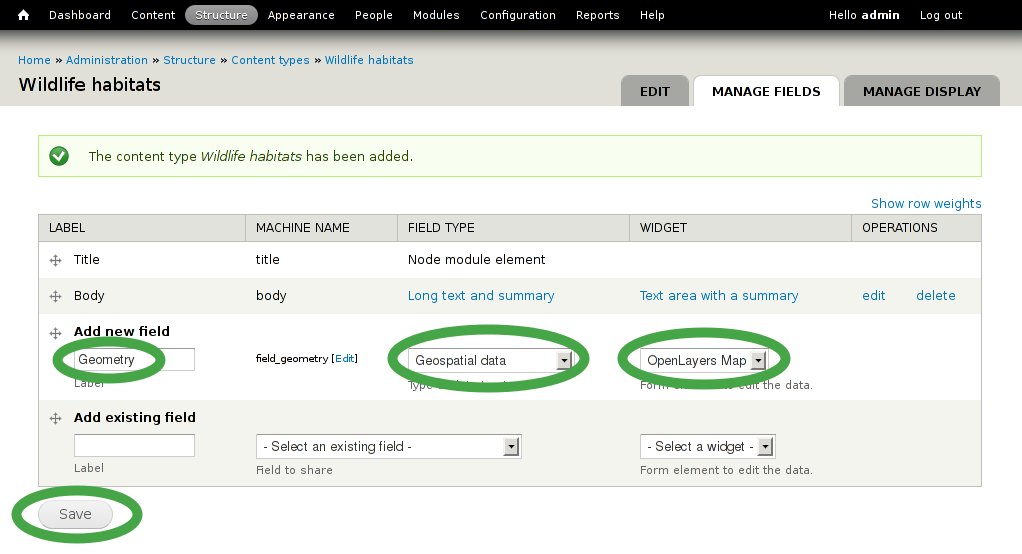
  • Choose Structure ‣ Content types from the menu bar and click on Add content type
../../_images/cartaro_contenttypes.png
  • Type a name for the new content type and describe it if you want
  • Finish by clicking on Save and add fields
../../_images/cartaro_new_contenttype.png
  • Add new field by choosing a descriptive name, select Geospatial data as field type and OpenLayers Map as widget
  • Finish by clicking on Save
../../_images/cartaro_new_field.png
  • Select the geometry type that describes the kind of geospatial information you want to store. Choose Polygon to follow our example.
  • Finish by clicking on Save field settings

Tip

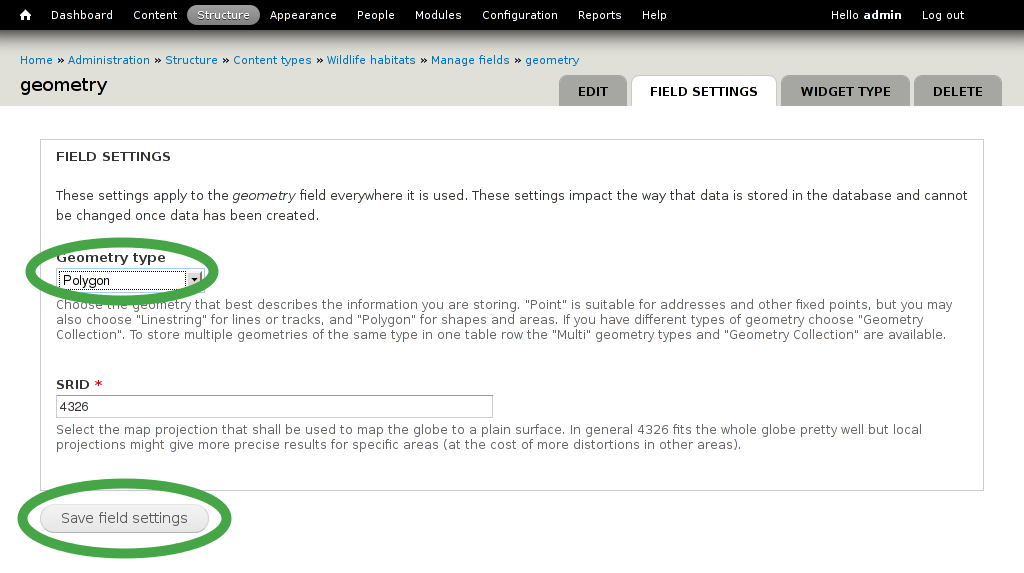
Other types of geometry are also available. Choose the type that fits best for your needs. Read the information below the Geometry type drop-box for additional help.

../../_images/cartaro_field_settings.png
  • Press Save settings to finally finish the field creation
../../_images/cartaro_manage_field.png

Configure GeoServer

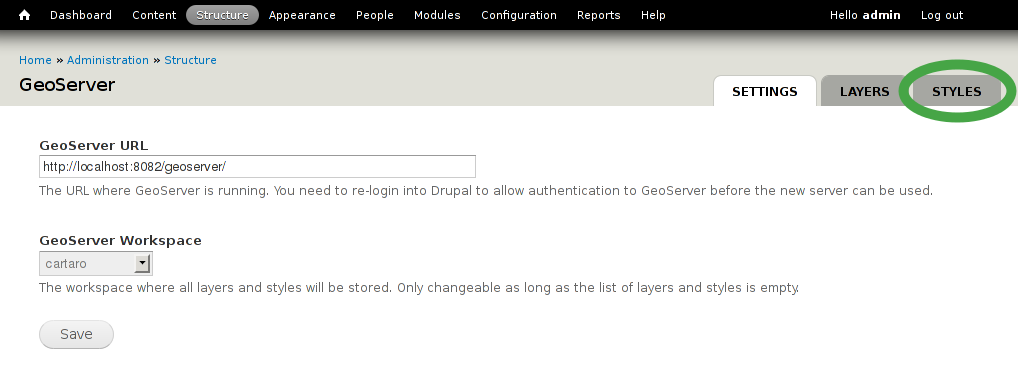
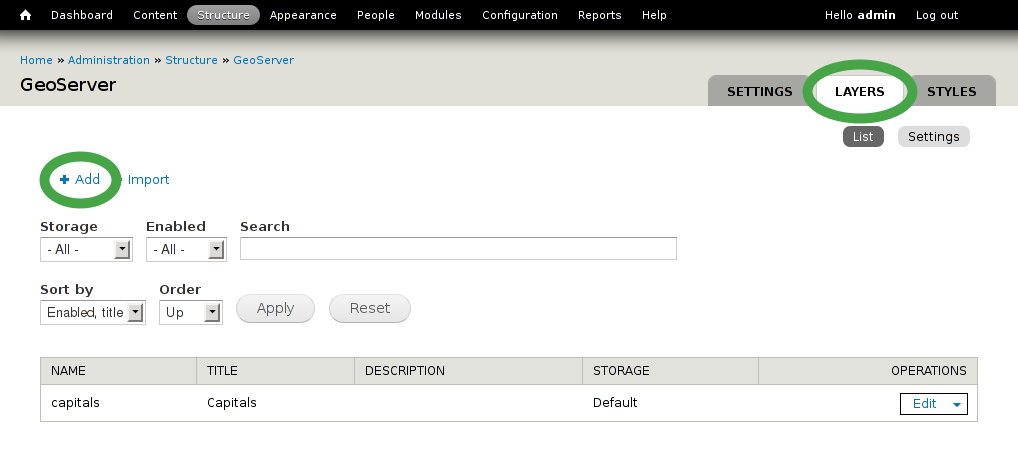
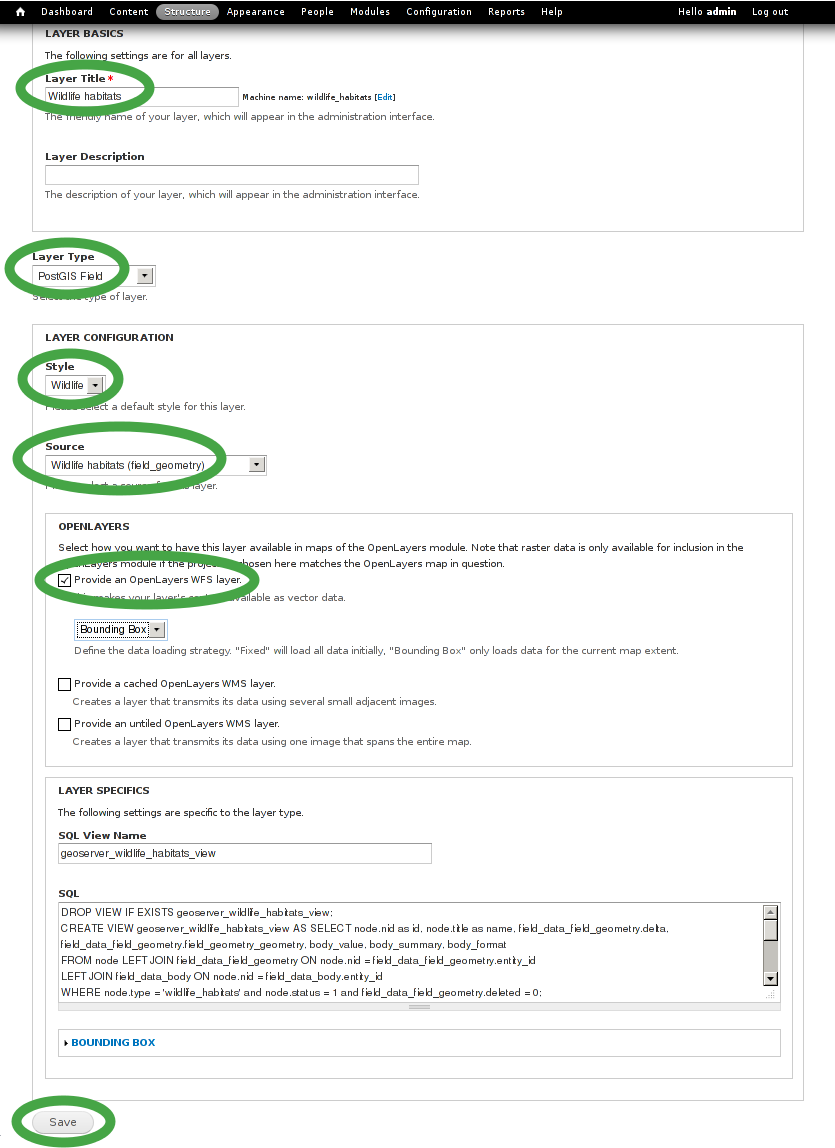
GeoServer is used to provide the geospatial fields of your new content type as layer via Web Feature Service (WFS) and Web Map Service (WMS).

  • Choose Structure ‣ GeoServer from the menu bar to visit the GeoServer configuration page
../../_images/cartaro_geoserver_entry.png

Styling

Note

This subsection is optional. Just go the next subsection if you want to speed up.

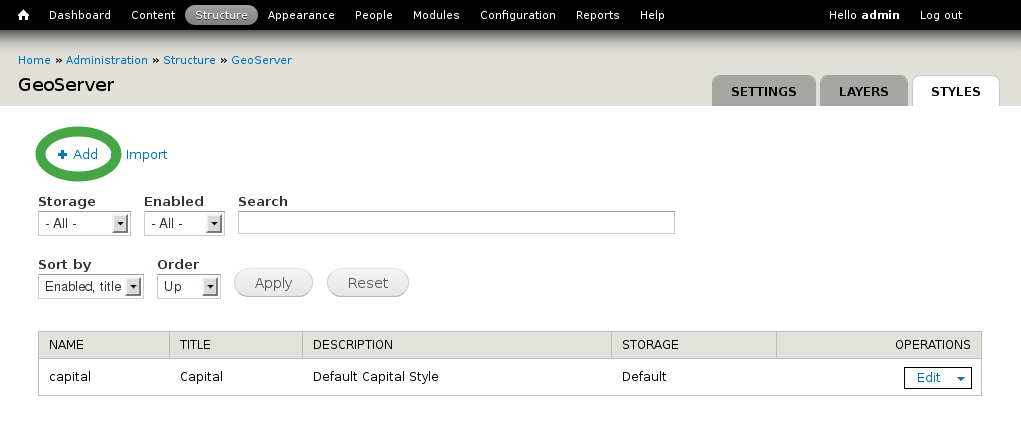
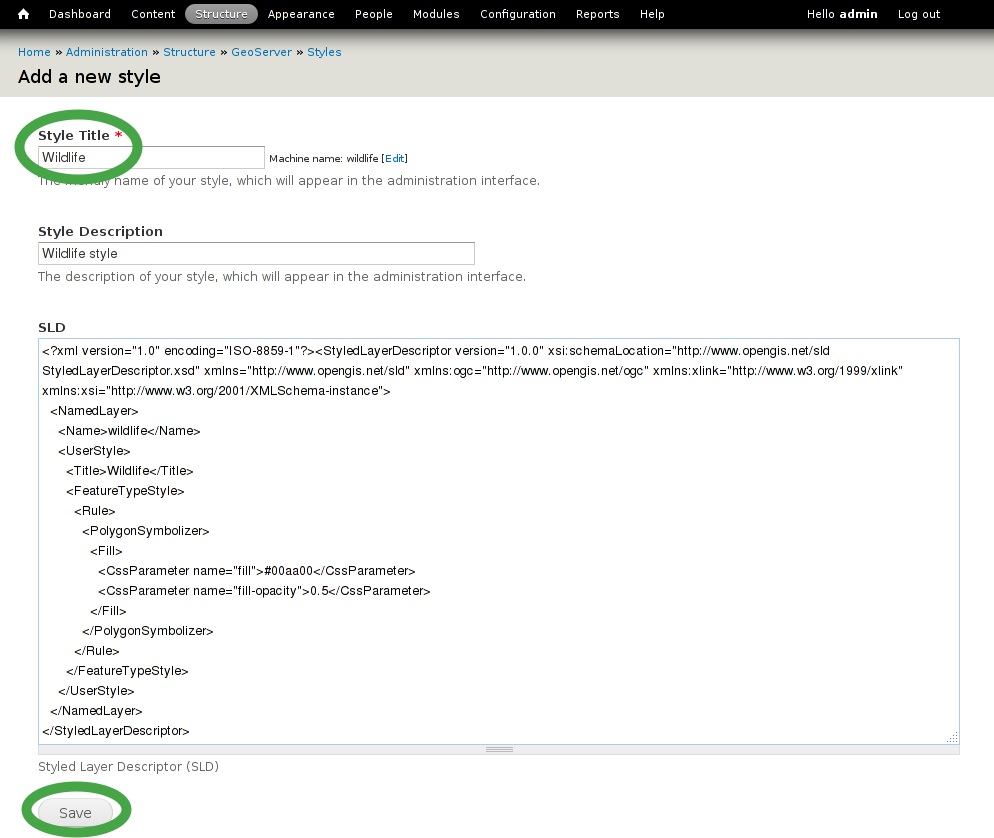
To change the symbolization of your geospatial fields within a map layer you can define your own style. This is done with the Styled Layer Descriptors (SLD) as XML files. There are several ways on how create them which is not covered here. The GeoServer documentation describes one way on how the create them. For the sake convenience we created an example styling that can be used here.

  • Choose Styles on the right side
../../_images/cartaro_geoserver_style.png
  • Choose a name for your new style
  • Copy the following example SLD into the SLD text box and click Save
  • Mind to adjust the content of the Name and Title tags in the SLD to match Style Title and Style Description respectively
<?xml version="1.0" encoding="ISO-8859-1"?><StyledLayerDescriptor version="1.0.0" xsi:schemaLocation="http://www.opengis.net/sld StyledLayerDescriptor.xsd" xmlns="http://www.opengis.net/sld" xmlns:ogc="http://www.opengis.net/ogc" xmlns:xlink="http://www.w3.org/1999/xlink" xmlns:xsi="http://www.w3.org/2001/XMLSchema-instance">
<NamedLayer>
  <Name>wildlife</Name>
   <UserStyle>
      <Title>Wildlife</Title>
          <FeatureTypeStyle>
              <Rule>
                  <PolygonSymbolizer>
                      <Fill>
                          <CssParameter name="fill">#00aa00</CssParameter>
                          <CssParameter name="fill-opacity">0.5</CssParameter>
                      </Fill>
                  </PolygonSymbolizer>
              </Rule>
          </FeatureTypeStyle>
      </UserStyle>
  </NamedLayer>
</StyledLayerDescriptor>
../../_images/cartaro_new_style.png

Layers

  • Choose Structure ‣ GeoServer from the menu bar to visit the GeoServer configuration page
  • Select Layers and click Add to add your new layer
../../_images/cartaro_geoserver_layer.png
  1. Type a suitable layer title
  2. Select PostGIS Field as Layer type
  3. If you have created your own style one step before, select it as Style
  4. Select your fresh created content type as Source
  5. Check Provide an OpenLayers WFS layer within the OpenLayers section
  6. Finish configuration by clicking on Save
../../_images/cartaro_new_layer.png

Tip

You can now also access the geospatial fields of your content type via WFS or WMS with other applications (e.g. with QGis)

Configure OpenLayers

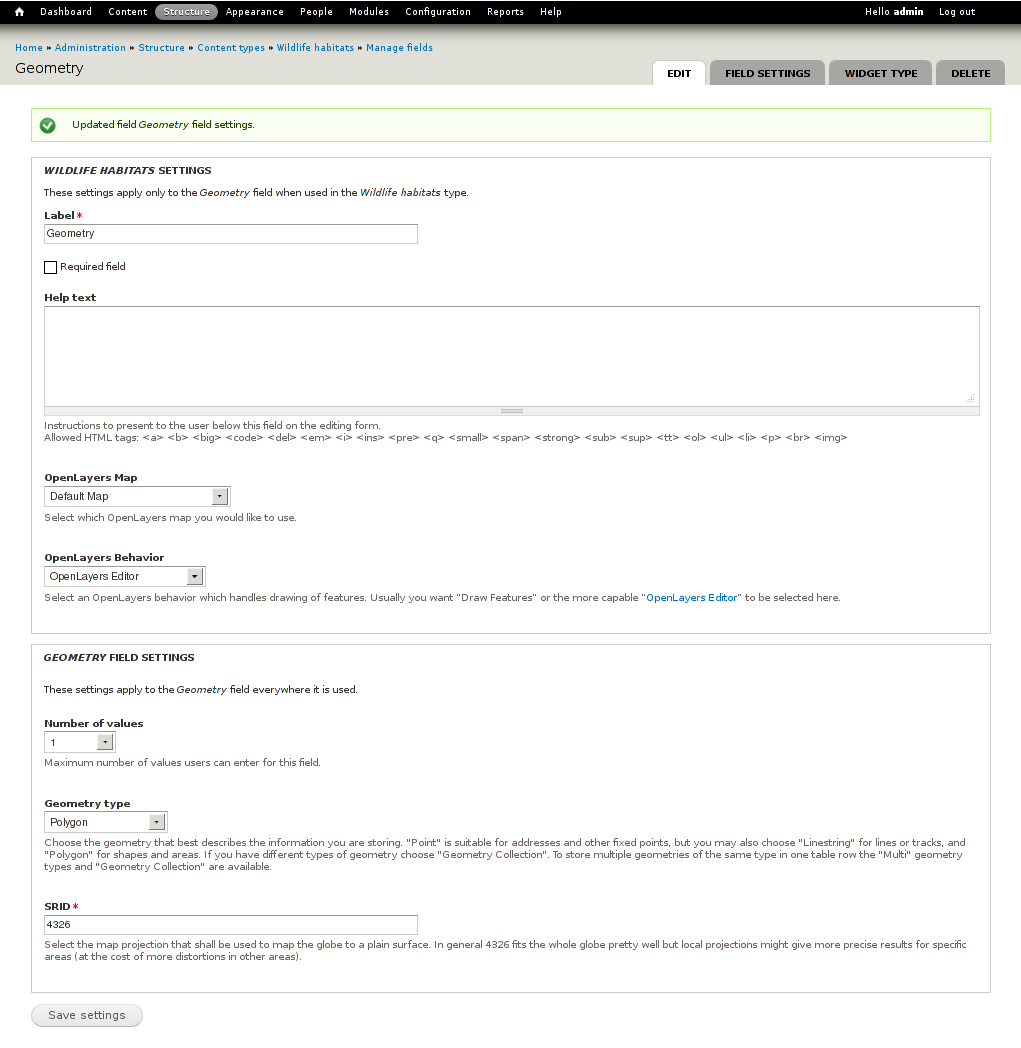
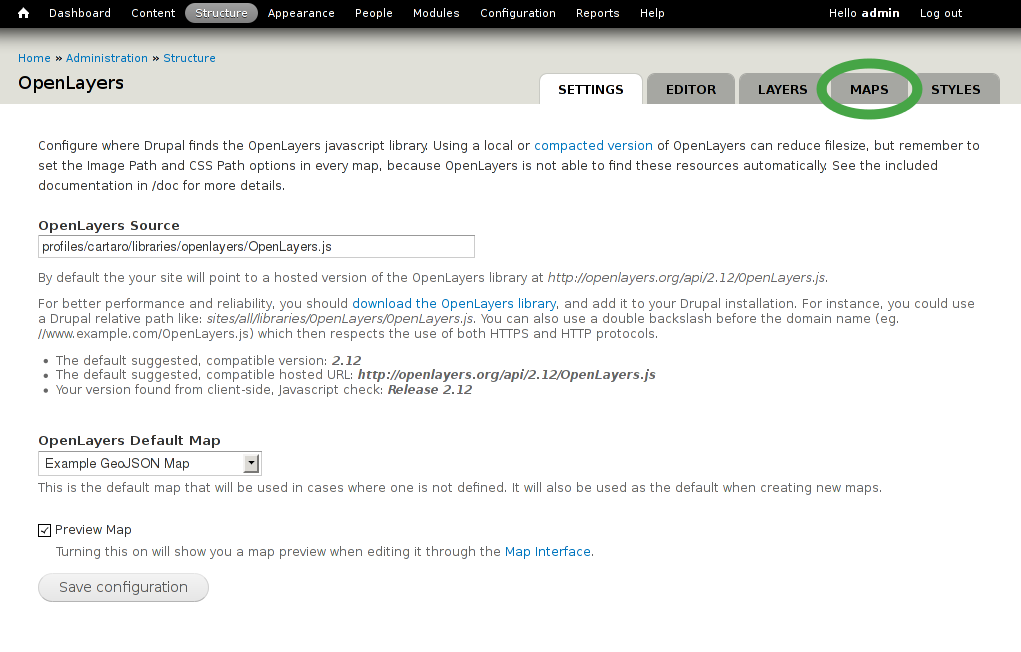
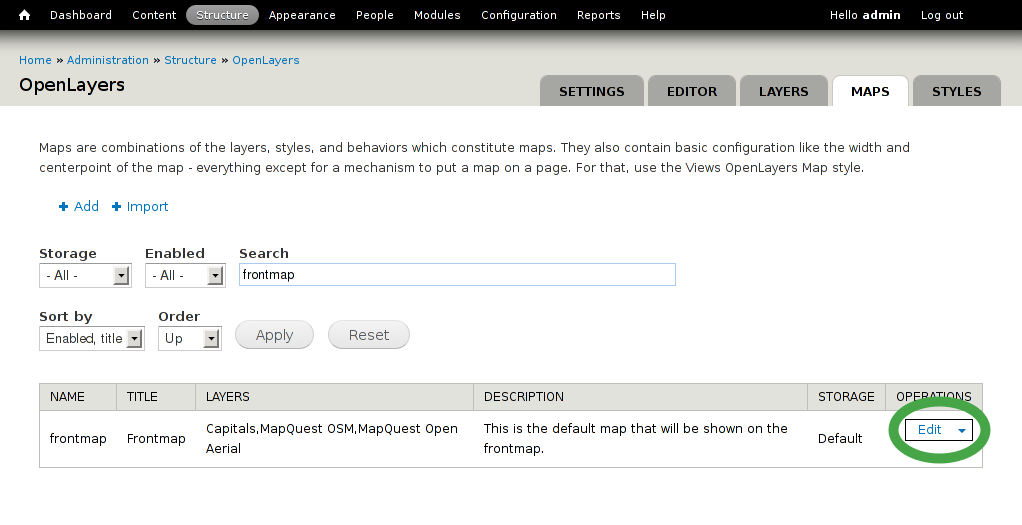
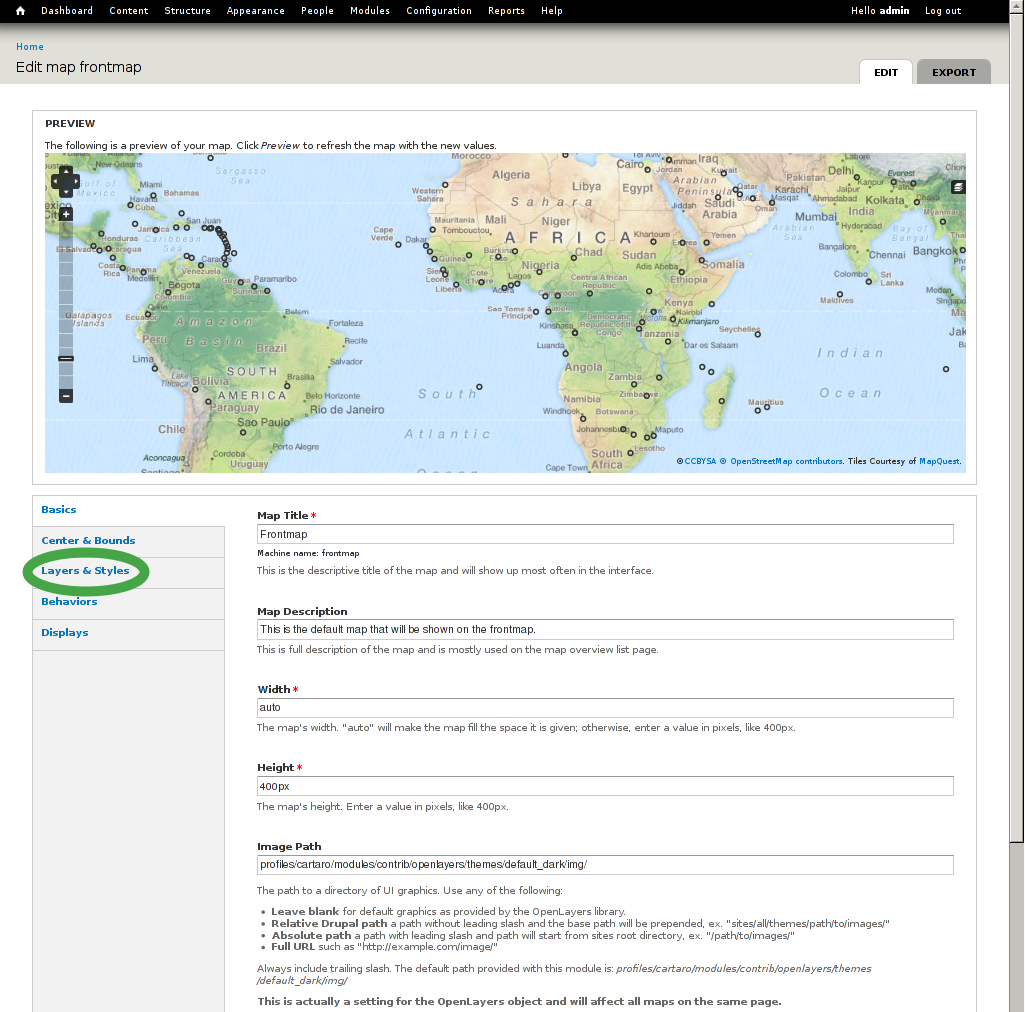
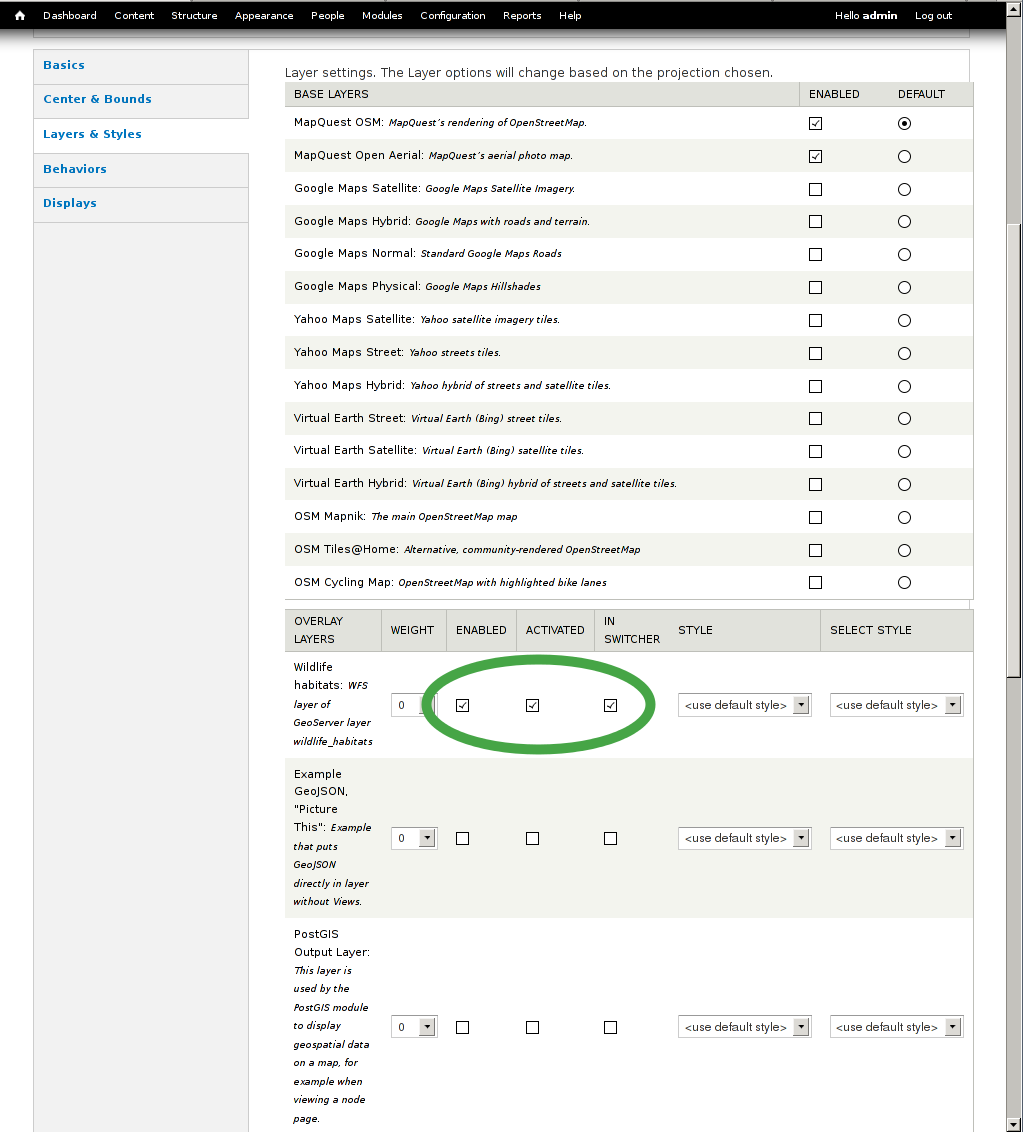
OpenLayers is used to display your new layer.

  • Choose Structure ‣ OpenLayers from the menu bar to visit the OpenLayers configuration page
  • Choose Maps and look for frontmap which is used as default map

Note

An OpenLayers version warning appears only the first time you visit the OpenLayers configuration page and can be ignored.

../../_images/cartaro_openlayers_entry.png
  • Look for frontmap which is used as default map and select Edit on the right side
../../_images/cartaro_openlayers_maps.png
  • Frontmap’s configuration page will be appear as shown on the screenshot below.
  • Select Layers & Styles on the left side to add our newly created layer to the map.
../../_images/cartaro_edit_map.png
  • Look for your new created layer (Wildlife habitats in our example)
  • Check the boxes Enabled, Activated and In Switcher to show your new layer by default
  • Finish configuration by clicking on Save at the bottom of the page
../../_images/cartaro_edit_map211.png

Add content

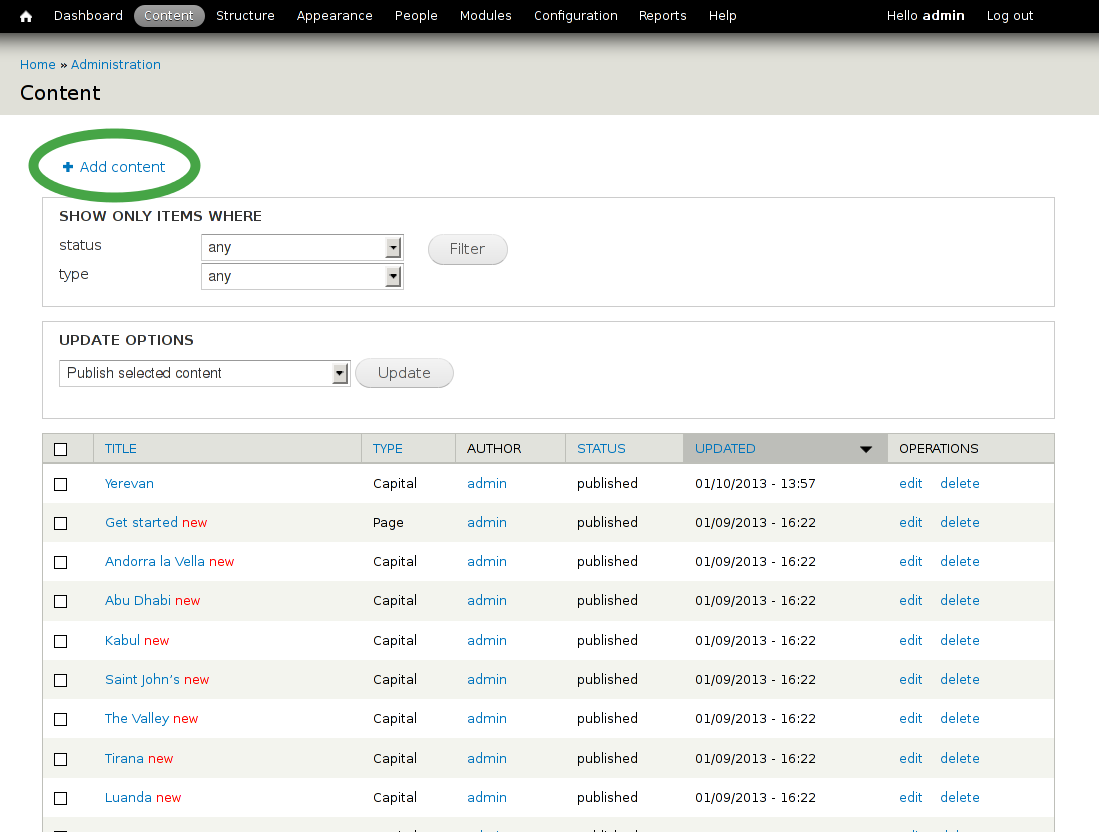
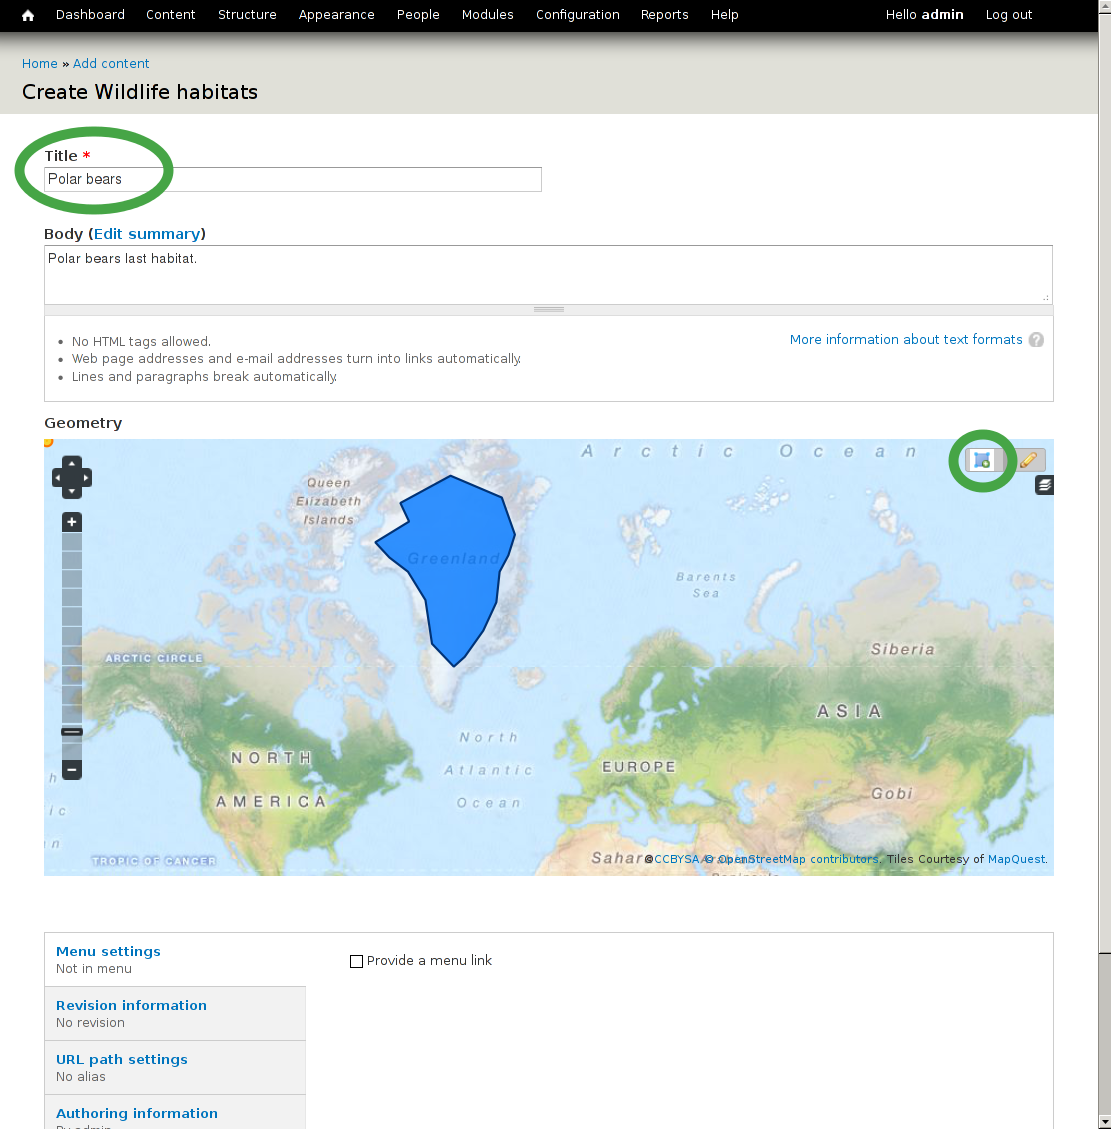
After creating your content type you can now add as many elements of this type as you want.

  • Choose Content from the menu bar to see all exisiting content elements within your Cartaro installation
  • Select Add content to add more content
  • Choose your new content type
../../_images/cartaro_content_overview.png
  1. Type a name for your new content element
  2. You can now draw the geometry for your element. Choose the draw symbol on the upper right corner of the map. Note that tool tips are shown when you hover the toolbar icons.
  3. Simply click on the map to create a new geometry. Every click will produce a new edge. Finish the drawing with double click.
  4. When you are ready, click on Save at the bottom.

Note

Only one geometry per content element can be drawn in our example configuration. Create additional content elements to add more polygons.

../../_images/cartaro_create_content211.png
  • You should now see your new content element
  • To view your new content element on the front map, click on the house icon in the upper left corner

Tip

If you are not satisfied with your result, you can easily edit your new content element and change the geometry

../../_images/cartaro_content_preview211.png

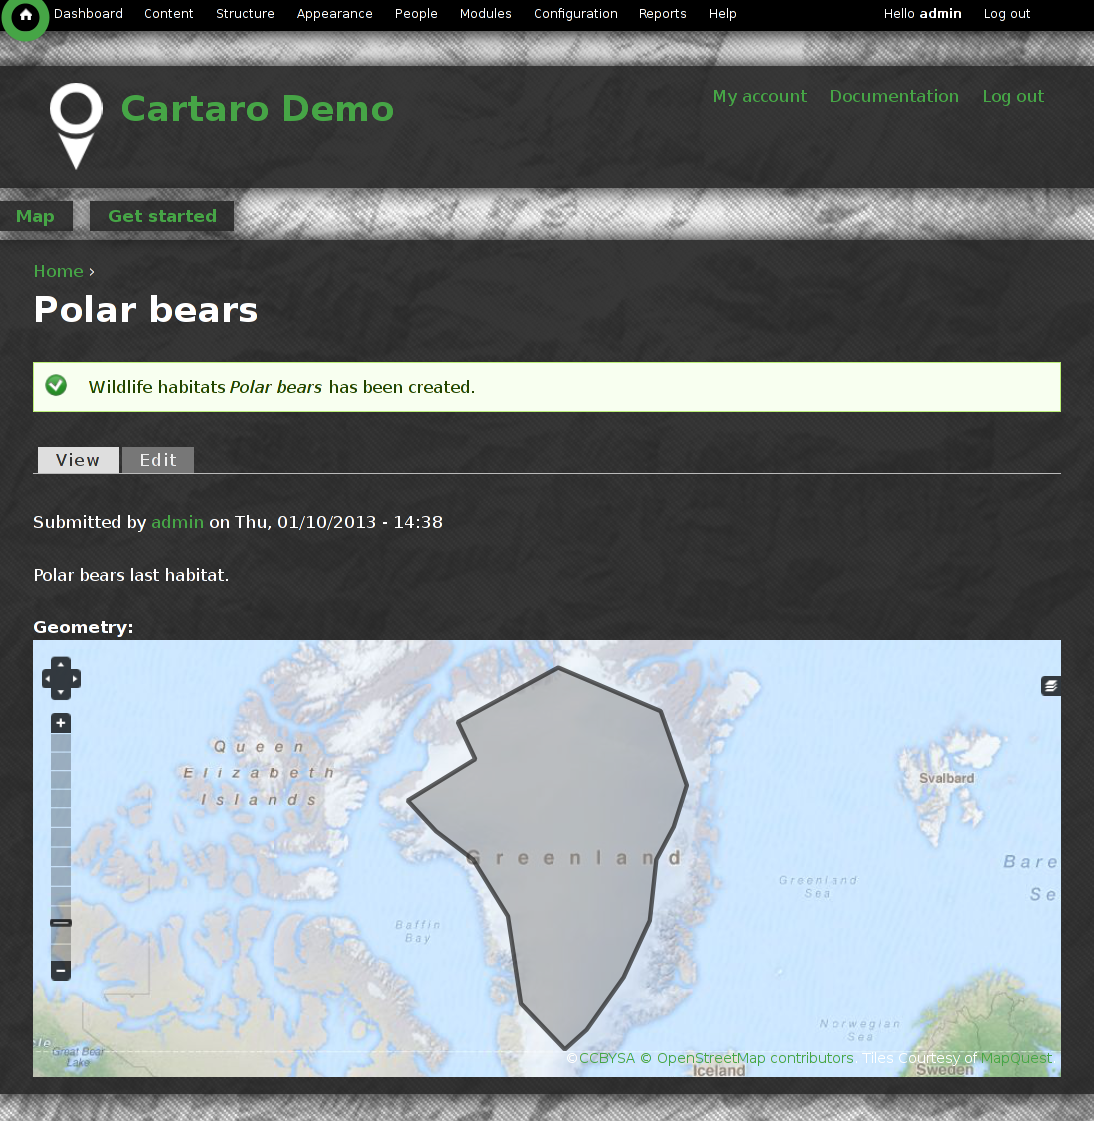
Congratulations, you have just finished the quickstart tutorial. Your first content element is now ready. To add more content elements simply peform the steps of this section again.

../../_images/cartaro_frontmap_new.png

Things to Try

  • Use the Layer Assistant to include external layers Structure ‣ Open Layers ‣ Layers ‣ Add using assistant
  • Change the default map behaviors and build your own map
  • Try different geometry types and build more complex content types

What Next ?

The quickstart has given a first impression about the possibilities of Cartaro to you. But there is a lot more to discover.

Your next step may be to install Cartaro on your own servers. Just visit http://cartaro.org/documentation/getting-started to learn how.

In context to this quickstart, our documentation about Layer Assistant or about Styling

Our documentation web page can be found here http://cartaro.org/documentation

Available on http://cartaro.org
Copyright & Disclaimer