This quickstart describes the preferred method for creating a Bootable OSGeo-Live USB flash drive. Booting from a flash drive is faster than from a DVD, and the USB drive can be configured to store data between sessions.
We have have found that there are a number of quirks and tricks involved in successfully building a USB drive. We have documented what we know, but there are likely more tricks and issues. Look for latest tips here: http://wiki.osgeo.org/wiki/Live_GIS_Disc_Quick_Start_for_USB
- For a 4 GB USB flash drive, use osgeo-live-mini ISO (without Windows and Mac installers)
- For a 8 GB USB flash drive, use either osgeo-live-mini ISO, osgeo-live ISO (with Windows and Mac installers)
(This is the recommended process for creating a USB. It is applicable to Ubuntu and Ubuntu variants such as Xubuntu and OSGeo-Live.)
Note
The version of Ubuntu you are running, needs to be the same or newer than the version of Xubuntu being installed onto your USB. If installing OSGeo-Live 7.0 onto a USB, then you will need to be running Ubuntu 12.04 or newer.
Download osgeo-live or osgeo-live-mini to your computer’s hard drive.
Boot your computer into a recent Ubuntu/Xbuntu distribution. You can do this by running from an OSGeo-Live DVD, as explained in OSGeo-Live Quickstart.
Insert the USB flash drive into your computer.
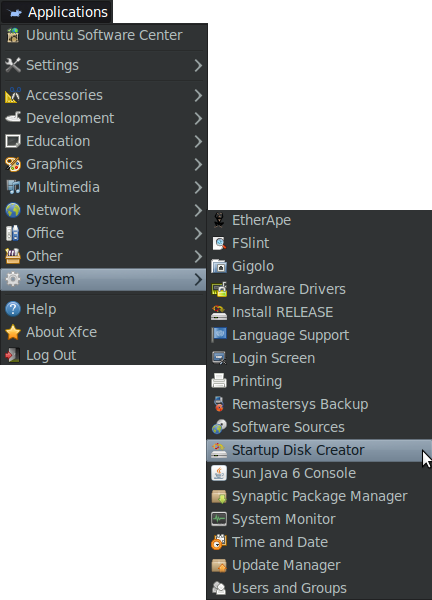
Select Applications ‣ System ‣ Startup Disk Creator, or search for Startup Disk Creator from the Unity desktop.
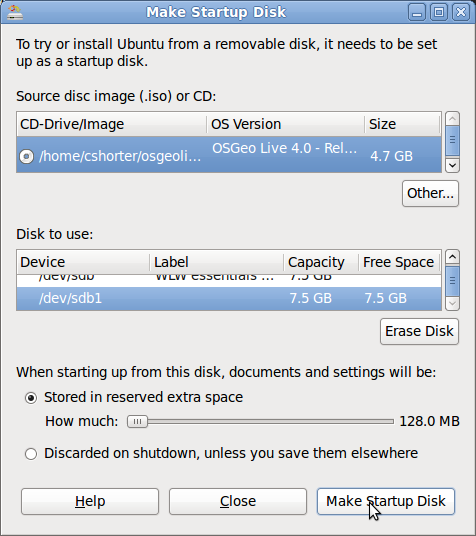
Select the osgeo-live or osgeo-live-mini ISO Image that you downloaded earlier.
Select the USB flash drive. If you have extra room you might adjust the slider to create persistent storage space on the USB drive (recommended). In order for this option to be available you will need a 8 GB USB flash drive.
Select Make Startup Disk
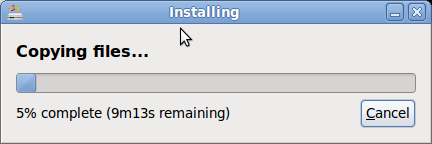
Wait 20 minutes or so for the USB flash drive to be created.
Run as per: OSGeo-Live Quickstart
- OSGeo-Live Quickstart
- OSGeo-Live Quickstart for Running in a Virtual Machine
- Install OSGeo-Live to Hard Disk
- Alternative USB creation methods and latest tips are collected here: wiki
- Questions can be directed to our email list: http://lists.osgeo.org/mailman/listinfo/live-demo